- Partner von

Backpulver-Vulkan: Experiment für Kinder
Experiment backpulver-vulkan.
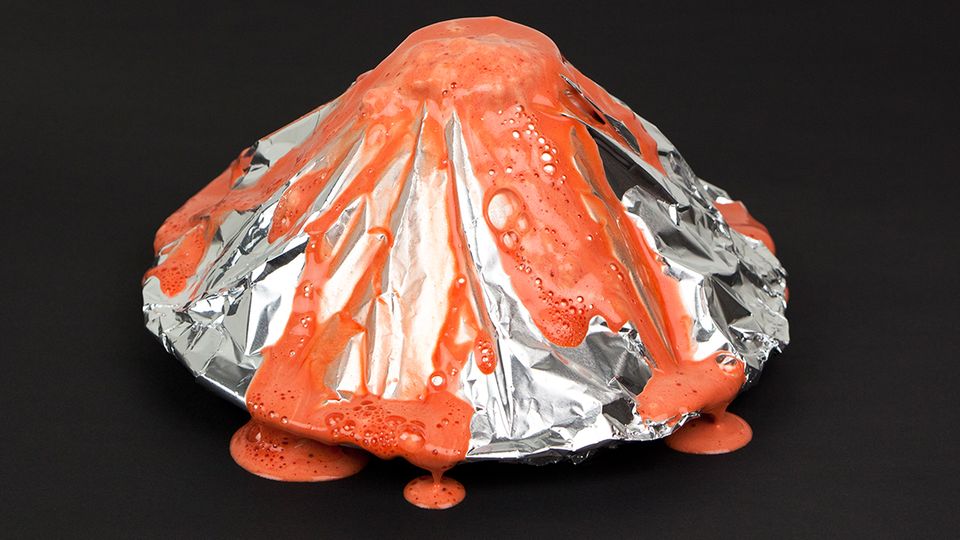
Das Vulkan-Experiment
Diese materialien braucht ihr:.
- Alufolie und Klebeband
- 3 Päckchen Backpulver
- 1–2 Päckchen rote Lebensmittelfarbe
- ein halbes Glas Essig
- ein halbes Glas Wasser
- eine große, wasserdichte Unterlage (z. B. ein Tablett)

Experiment:
- Klebt eines der beiden Gläser mit einem Röllchen aus Klebeband mittig auf den Teller.
- Legt zwei Bahnen Alufolie darüber, sodass Teller und Glas bedeckt sind. Klebt die Ränder der Folie an der Unterseite des Tellers fest.
- Schneidet - wie im Bild zu sehen - in die Mitte der Glasöffnung mit der Schere ein kleines Loch in die Alufolie. Schneidet von dort aus ein Kreuz– aber nur so weit, bis ihr den Innenrand des Glases erreicht.
- Knickt die vier Ecken der Alufolie nach innen und klebt sie am Innenrand des Glases fest.
- Gebt das Backpulver in den Vulkankrater. In dem zweiten Glas mischt ihr Wasser und Essig mit Lebensmittelfarbe, bis die Flüssigkeit dunkelrot ist. Gebt dann einen Spritzer Spülmittel dazu. Wichtig : Stellt euren Vulkan spätestens jetzt auf eine wasserdichte Unterlage, sonst läuft Lava auf den Tisch oder den Boden! Kippt das rote Gemisch in den Alufolienkrater – schon bricht euer Vulkan aus.

Der Ausbruch des Backpulver-Vulkans im Video
Was chemisch gesehen passiert, wenn der Vulkan ausbricht, verraten wir euch in diesem Artikel .

Basteln Experimente
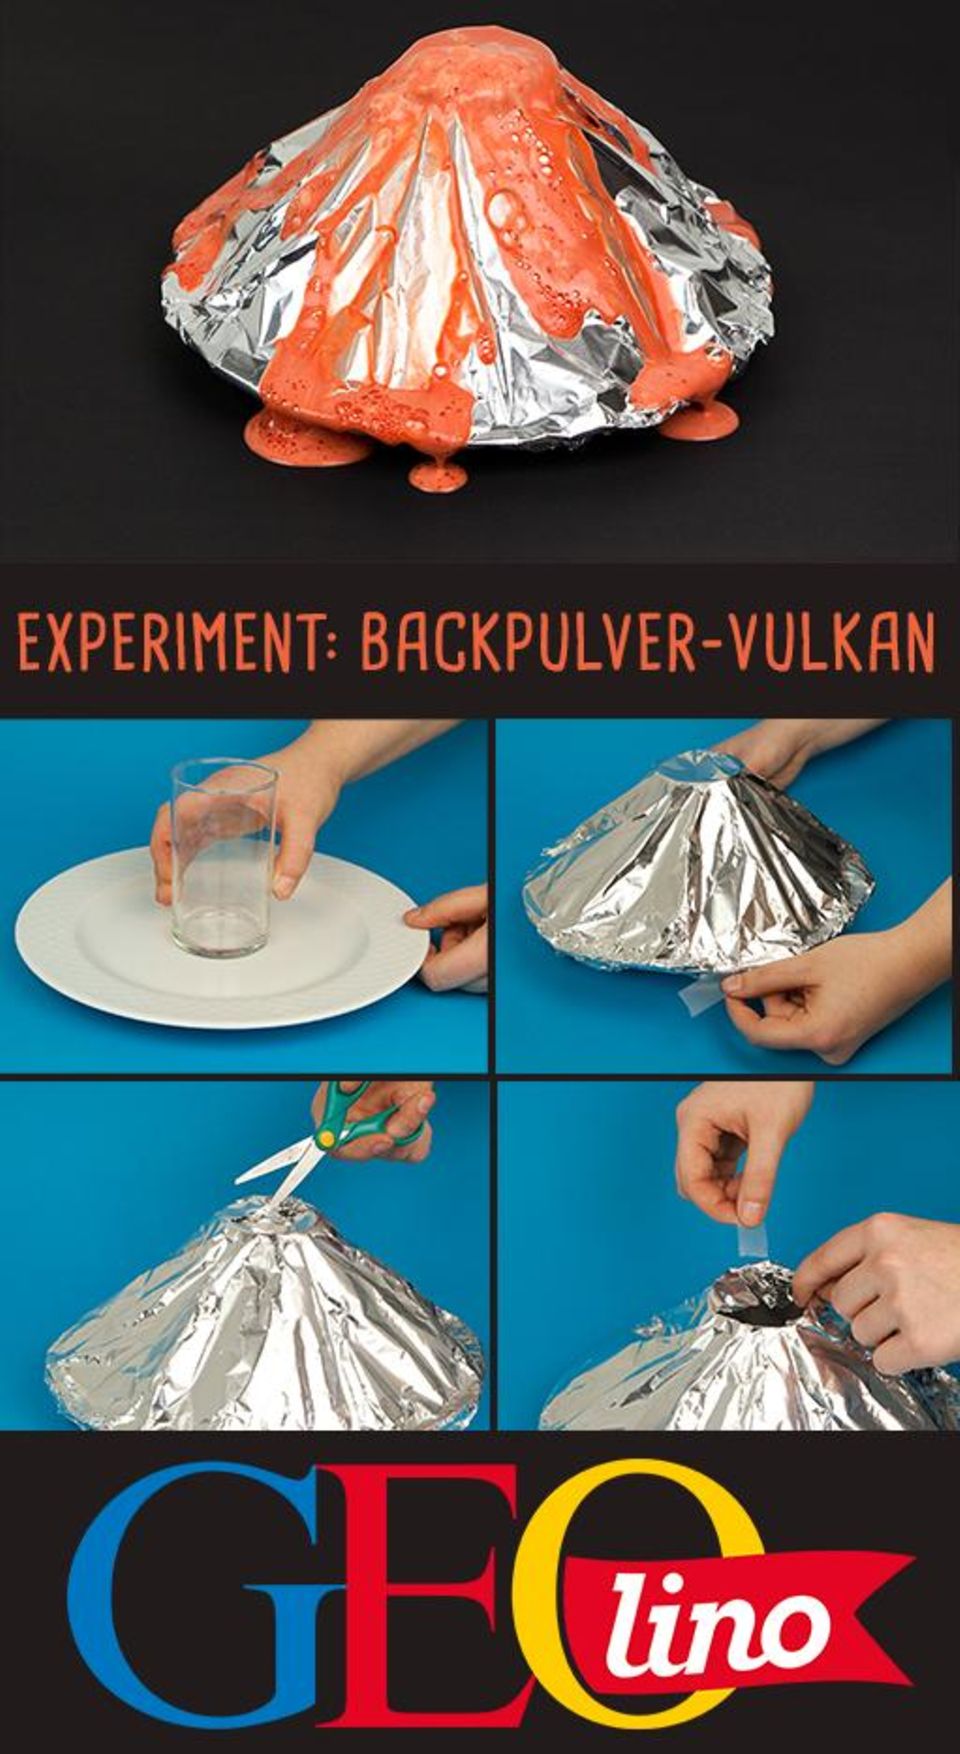
Möchtet ihr euch dieses Experiment merken, um es später ausprobieren zu können? Dann pinnt die Anleitung dazu mit diesem Bild doch auf eure Pinterest-Pinnwand!
Auf unserer Experimente-Pinnwand zeigen wir euch übrigens noch mehr tolle GEOlino-Experimente. Schaut doch mal vorbei und folgt unserem GEOlino Pinterest-Kanal !
- Experimente
- Vulkanausbruch
Anleitung So macht ihr euer Zuhause für Halloween schön gruselig!
Bastelanleitung Buhuuuu: Gruselgeister zu Halloween
Halloween-Deko Wir basteln leuchtende Zombie-Hände
Mehr zum thema.
Mitmachen Kunst aus Büroklammern

Anleitung Löwenlaterne
Anleitung Schillernde Schaumparty

Anleitung Euer Wochenplaner
Anleitung Ein Kino für die Hände
Anleitung Sockenoktopus
Anleitung Fotobox aus Pappkarton
Basteltipp Ein Helikopter für Zuhause
Hallo Himmel Das Wintersechseck und die Jahreszeiten am Himmel
Ägypten Malen wie die alten Ägypter
Rezept Mini Burger
Aktuelle hefte und abos.

GEOlino Manatis

GEOlino mini Walhai
Extra Aufgetischt! - So Isst die Welt

MEIN ERSTES GEOLINO Unser tolles Lichterfest

GEOlino GEOlino Ferienheft 2024
GEOlino mini Ferienheft 2024
GEOlino Mini Wimmelheft 2023 Die besten Suchbilder aus GEOlino Mini

GEOlino Sonderausgabe 01/2024 Wie? Was? Warum?
- Damoklesschwert
- Bilder-Quiz Bäume
- Wie entsteht eine Lawine?
- Vogelfutter selbst machen
- Mondlandung
- Anleitungen zum Laternen basteln
- So lasst ihr Seifenblasen gefrieren
- Baut einen Backpulver-Vulkan!
- Heiße Steine
- So baut ihr einen Futterkasten für Eichhörnchen
- Zuckerkristalle
- So macht ihr Leuchtkreide selbst!
- So braut ihr Apfelpunsch
- Gurken-Radieschen Fisch
- Emoji Pfannkuchen
- Feine Fledermäuse
- Geolino Archiv
- Partner GEOlino.de
- Schreibt uns!

- Die Küstenkids im Urlaub
- Die Küstenkids auf dem Spielplatz
- Küstenmami zu Gast
- Küstenmamis Blogroll
- Kooperationen
- Kontakt & Impressum
- Datenschutz
Donnerstag, 25. März 2021
Sprudelnder vulkan mit zitrone und brausepulver: ein experiment für kinder mit einfacher anleitung.

Der sprudelnde Vulkan: Spannender Versuch und Highlight bei einem Kindergeburtstag

Wie funktioniert der sprudelnde Vulkan chemisch gesehen?

Sprudelnder Vulkan mit Zitrone und Brausepulver

2 Kommentare :

Das ist so ein schönes Experiment, haben wir auch schon ein paar mal gemacht :) Liebe Grüße Alice von Andrina.de
Schön, dass euch das Experiment Spaß macht! Ja, wir haben es auch gleich mehrmals durchgeführt, es ist immer wieder spannend :) Liebe Grüße Küstenmami
Ich freue mich sehr über Eure Kommentare, vielen Dank dafür! Wenn du auf meinem Blog kommentierst, werden die von dir eingegebenen Formulardaten (und unter Umständen auch weitere personenbezogene Daten, wie z. B. deine IP-Adresse) an Google-Server übermittelt. Mehr Infos dazu findest du in meiner Datenschutzerklärung und in der Datenschutzerklärung von Google .
Science Fun

How to make a Volcano
- 10 ml of dish soap
- 100 ml of warm water
- 400 ml of white vinegar
- Food coloring
- Baking soda slurry (fill a cup about ½ with baking soda, then fill the rest of the way with water)
- Empty 2 liter soda bottle
Instructions:
NOTE: This should be done outside due to the mess.
- Combine the vinegar, water, dish soap and 2 drops of food coloring into the empty soda bottle.
- Use a spoon to mix the baking soda slurry until it is all a liquid.
- Eruption time! … Pour the baking soda slurry into the soda bottle quickly and step back!
WATCH THE QUICK AND EASY VIDEO TUTORIAL!
How it Works:
A chemical reaction between vinegar and baking soda creates a gas called carbon dioxide. Carbon dioxide is the same type of gas used to make the carbonation in sodas. What happens if you shake up a soda? The gas gets very excited and tries to spread out. There is not enough room in the bottle for the gas to spread out so it leaves through the opening very quickly, causing an eruption!
Extra Experiments:
1. Does the amount of vinegar change the eruption? 2. Does the amount of water change the eruption? 3. Does the amount of baking soda change the eruption?
EXPLORE TONS OF FUN AND EASY SCIENCE EXPERIMENTS!
SUBSCRIBE AND NEVER MISS A NEW SCIENCE FUN VIDEO!
previous experiment
Next experiment.
Vulkan zum Ausbruch bringen: Experiment mit Natron und Zitronensäure
Der Vulkanausbruch begeistert Groß und Klein. Das Experiment kannst du superleicht nachmachen. Foto: familienfuchs
- 4611
Wenn du dieses Experiment mit einem Vulkan deinem Kind noch nicht gezeigt hast, wird es höchste Zeit! Der Vulkanausbruch ist wirklich spektakulär und garantiert pure Freude. Nicht nur für die Kleinen, sondern auch für die Erwachsenen.
Das Experiment könnte auch der Renner bei einem Kindergeburtstag sein. Und das Beste: Es ist superleicht nachzumachen. Wir erklären dir Schritt für Schritt wie du den Vulkan bastelst.
Jeden Tag lernen unsere Kinder etwas Neues und brauchen dabei Unterstützung und Hilfe der Eltern, um nicht nur unsere große und interessante Welt zu erkunden, sondern auch die Schlussfolgerungen daraus zu ziehen. Dieser kleine und praktische Versuch könnte dabei helfen.
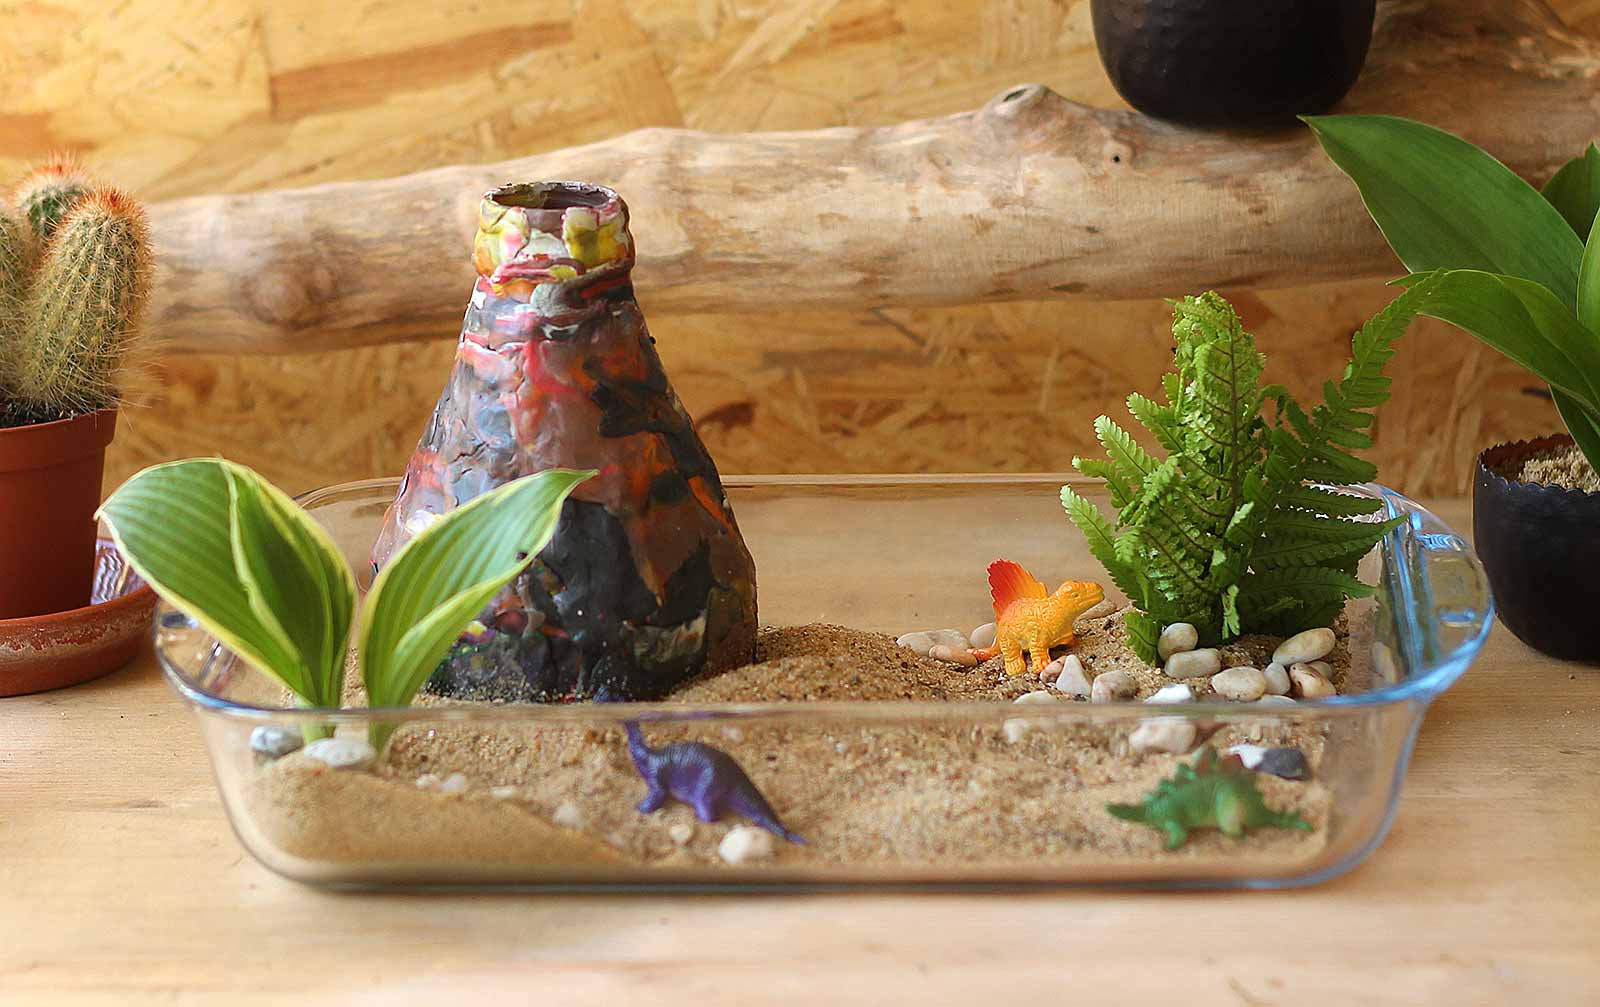
Um das Vulkanausbruch-Experiment richtig in Szene zu setzen, bereite das richtige Ambiente dafür vor. Beispielsweise könntest du eine Dinosaurier-Landschaft basteln.
Benutze als Untergrund Sand und kleine Steinchen . Es gehen aber auch Buchweizen, Hirse oder Reis, falls kein Garten in der Nähe ist. Dino-Spielsachen findest du bestimmt im Kinderzimmer.
Der Fantasie sind keine Grenzen gesetzt.
Wie kann ich denn nun den Vulkan basteln?
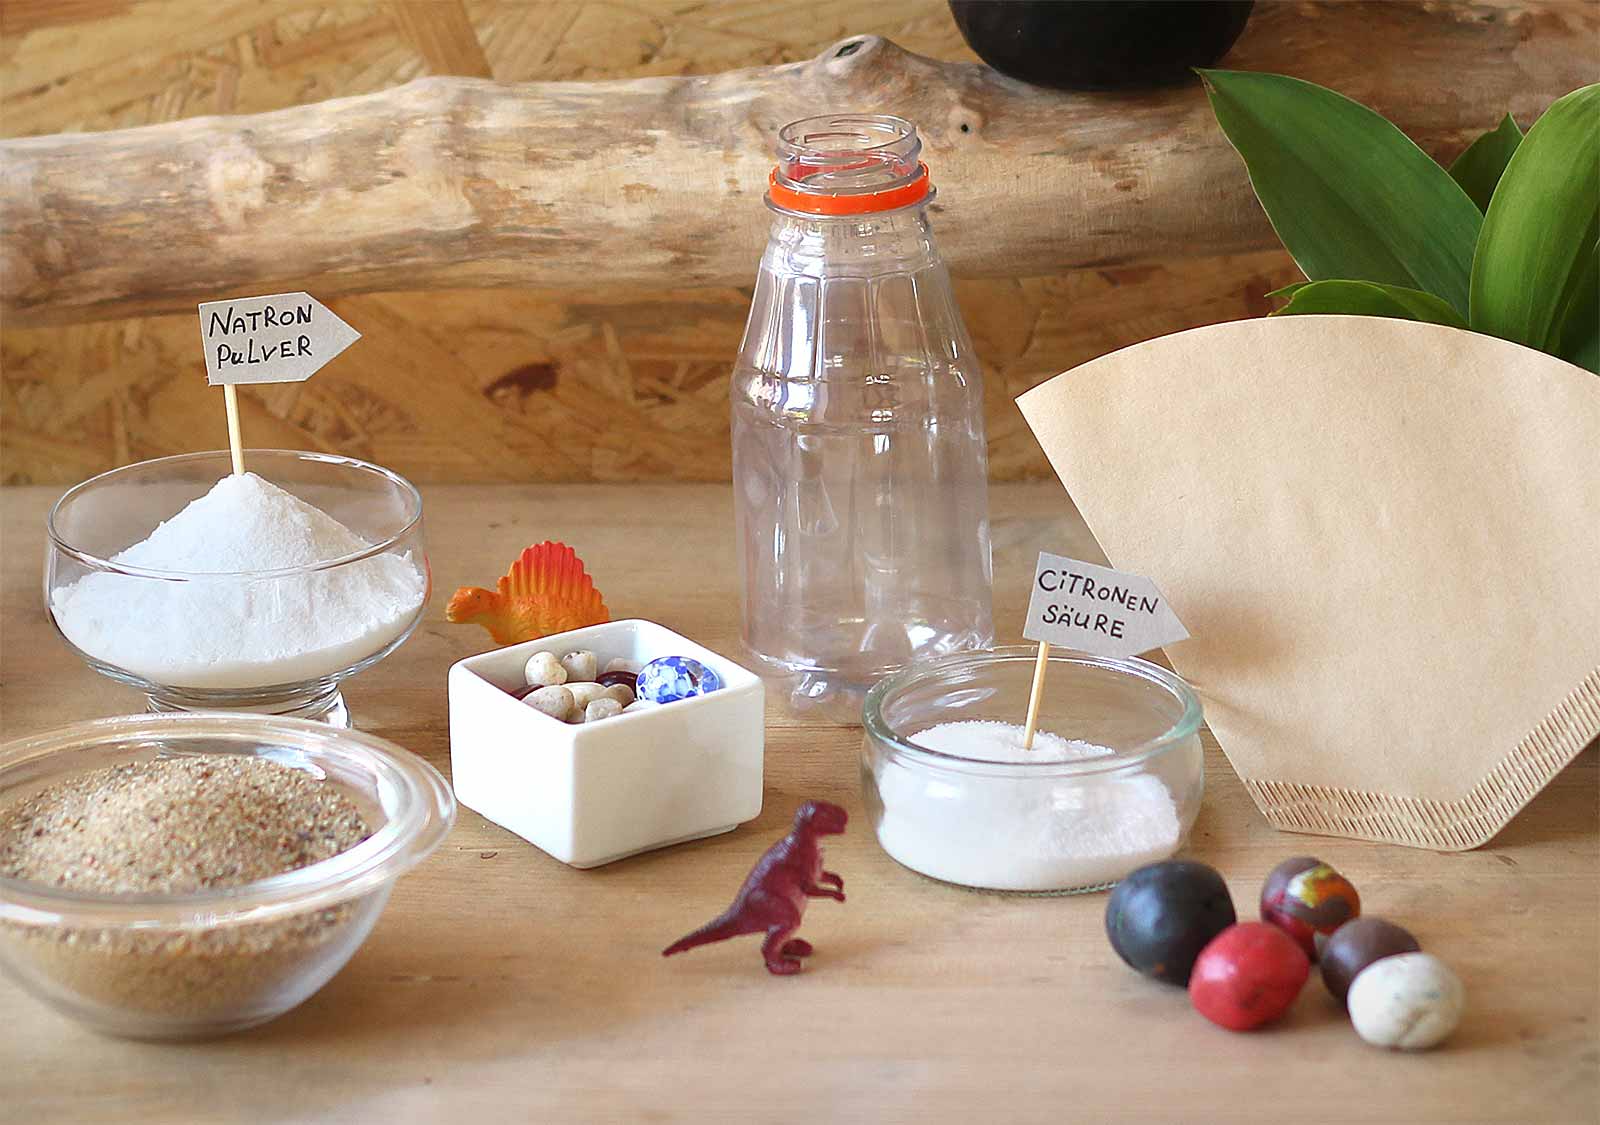
Diese materialien brauchst du:.
- Soda , Natron oder auch Backpulver (Natriumhydrogencarbonat NaHCO₃)
- Zitronensäure (C 6 H 8 O 7 ) oder Essig
- Lebensmittelfarben
- sehr schäumendes Spülmittel
- Kleine Plastikflasche
- Eine Schale als „Lava-Auffangbehältnis“
- Eine Schere
Für die Dekoration brauchst du zusätzlich:
- Kaffeefilter
- Sand, Reis, Steinchen, etc.
- Kleine Dinos
So bringst du die Naturkatastrophe in die eigenen vier Wände
Schritt 1: vulkan basteln.
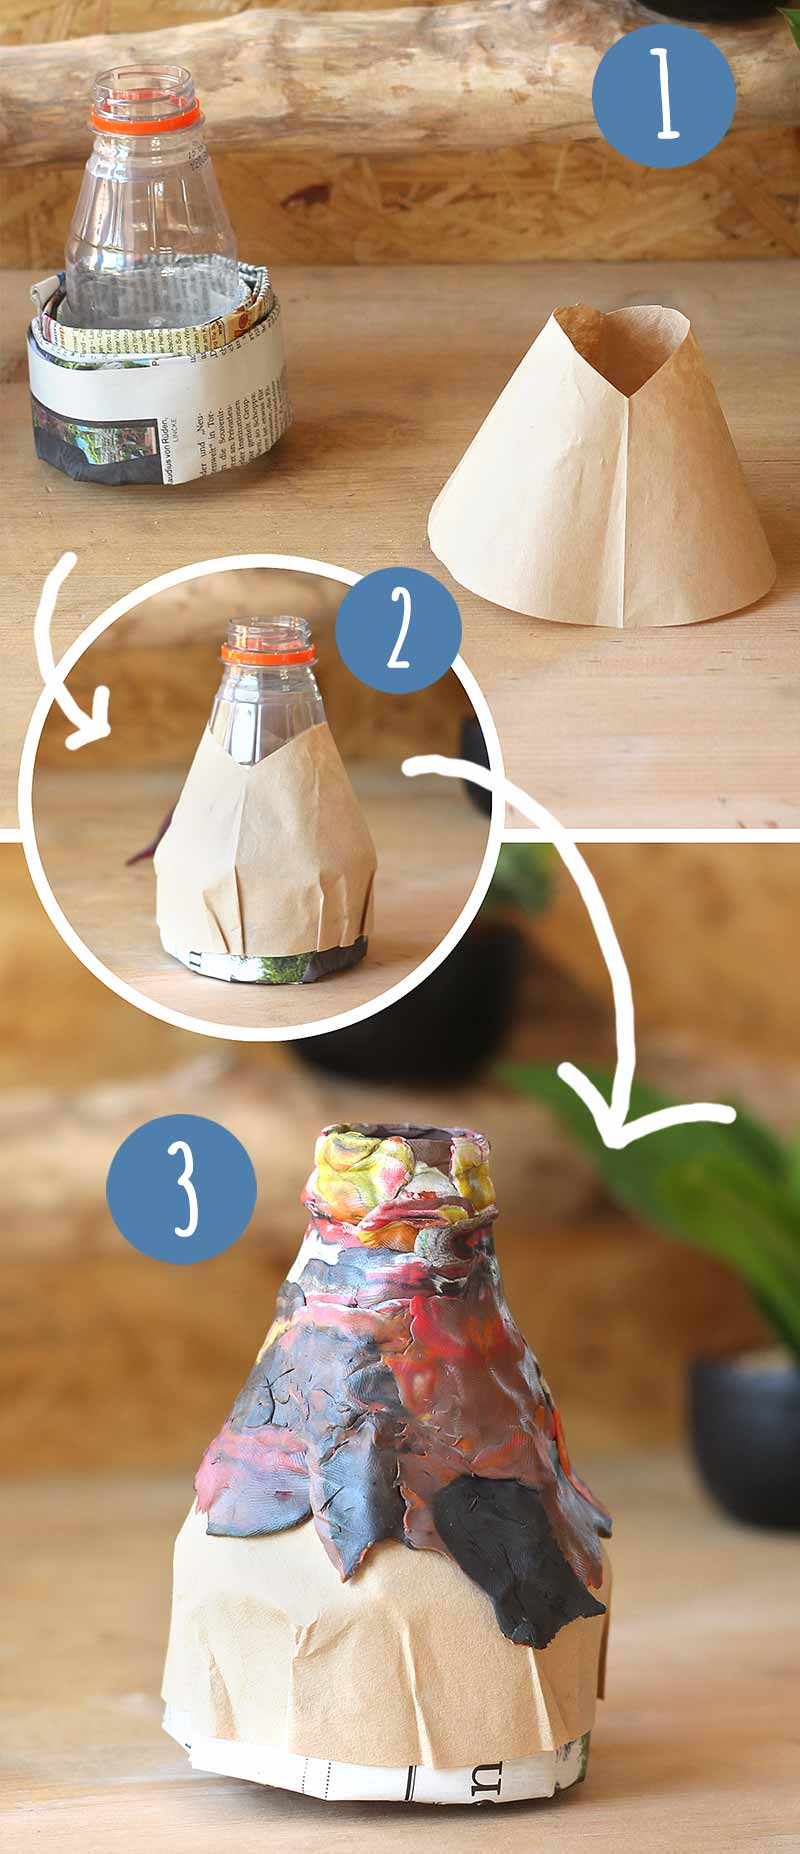
Mit Zeitungspapier und einem Kaffeefilter kannst du die Plastikflasche in Form bringen (siehe Fotos). Danach kannst du sie mit farblich passender Knetmasse verkleiden, bis die Flasche aussieht wie ein Vulkan. Danach kannst du ihn in eine große Schale stellen, damit beim Experiment nichts daneben geht. Dekoriere nun je nach Lust und Laune. Das können auch die Kleinen übernehmen.
Schritt 2: Natron einfüllen
Fülle das Soda beziehungsweise das Backpulver in die Flasche. Die Menge hängt von der Größe der Flasche ab. Natürlich auch davon wie viel Lava du willst! Mindestens vier Esslöffel sollten es aber sein. Je mehr Soda du nimmst, desto länger wird es aus dem Vulkan schäumen.
Schritt 3: Zitronensäure anrühren
Als nächstes rührst du die Zitronensäure an. Zirka fünf Esslöffel kommen auf ein halbes Glas Wasser. Vorsicht: Die Zitronensäure kann schwere Augenreizungen verursachen. Daher sollte dieser Schritt von einem Erwachsenen durchgeführt werden. Statt der Zitronensäure kann auch Essig benutzt werden. Der große Nachteil: Es riecht sehr stark!
Schritt 4: Säure einfärben
Als nächstes kommt Lebensmittelfarbe in eure Säure. Wir haben extrem ergiebige Lebensmittelfarbe benutzt, von der man tatsächlich nur einen Mini-Klecks benötigt. Rühr die Farbe ordentlich ein bis die Flüssigkeit dunkelrot ist. (Natürlich könnt ihr auch grüne oder blaue Lava herstellen). Für gute Schaumbildung kommt nun noch ein Spritzer Spülmittel hinein.
Schritt 5: Das Experiment kann starten
Nun kann es los gehen. Schütte die Säure vorsichtig nach und nach in den Vulkan. Mit Hilfe einer kurvenförmigen Pipette funktioniert das noch viel besser. Vor allem wenn Kinder die Säure einfüllen sollen.
Bitte nur unter Aufsicht!
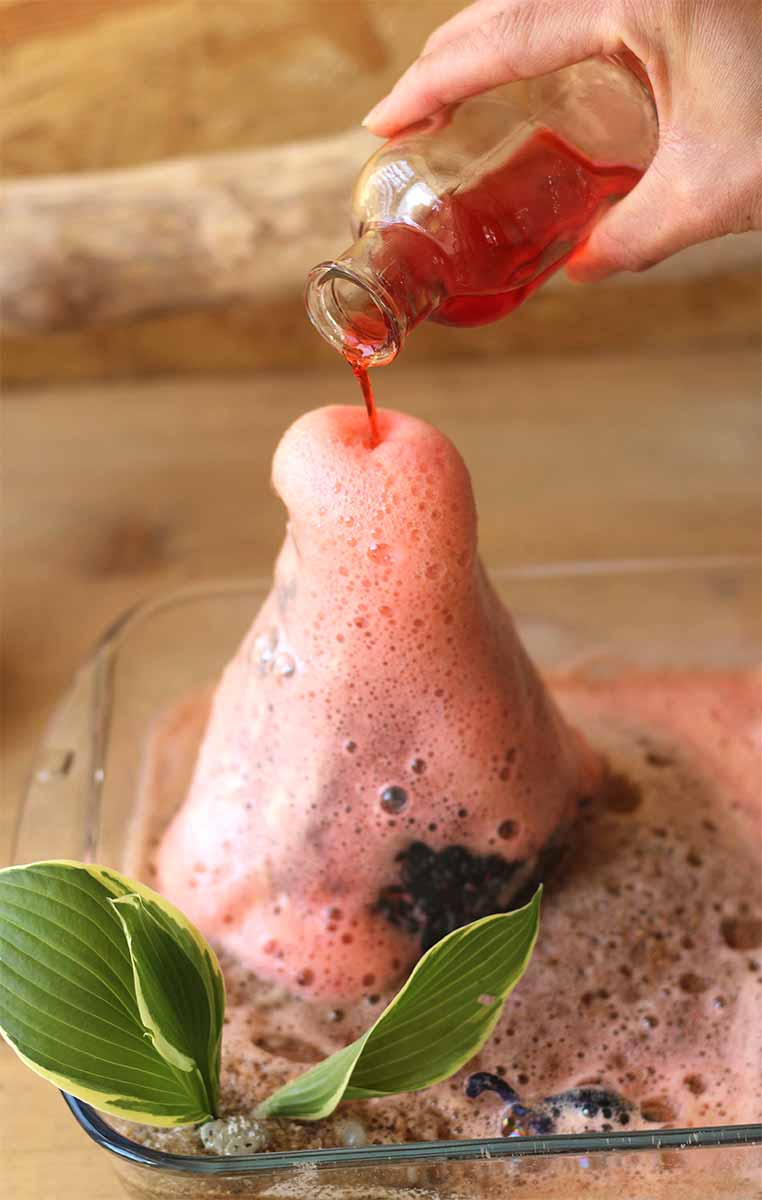
Das Experiment basiert auf einer Neutralisationsreaktion, da Zitronensäure (Essig) und das Soda im Wesentlichen sauer beziehungsweise alkalisch sind. Sie neutralisieren sich gegenseitig und setzen somit Kohlendioxid ( CO 2 ) — unsere Lava — frei. Das farblose Gas breitet sich stark aus und bringt auch das Spülmittel zum schäumen. Durch die starke Ausdehnung im Inneren der Flasche, tritt die „Lava“ rasch aus dem Behälter aus.
Ähnliches passiert auch bei einem echten Vulkanausbruch. Tief in der Erde herrschen Temperaturen von zirka 1000 °C. Dadurch schmelzen sogar Gesteine. Diese dehnen sich aus und sammeln sich in Magmakammern. Die Gase die dabei entstehen erhöhen den Druck innerhalb der Masse. Irgendwann ist der Druck so hoch, dass der Vulkan ausbricht.
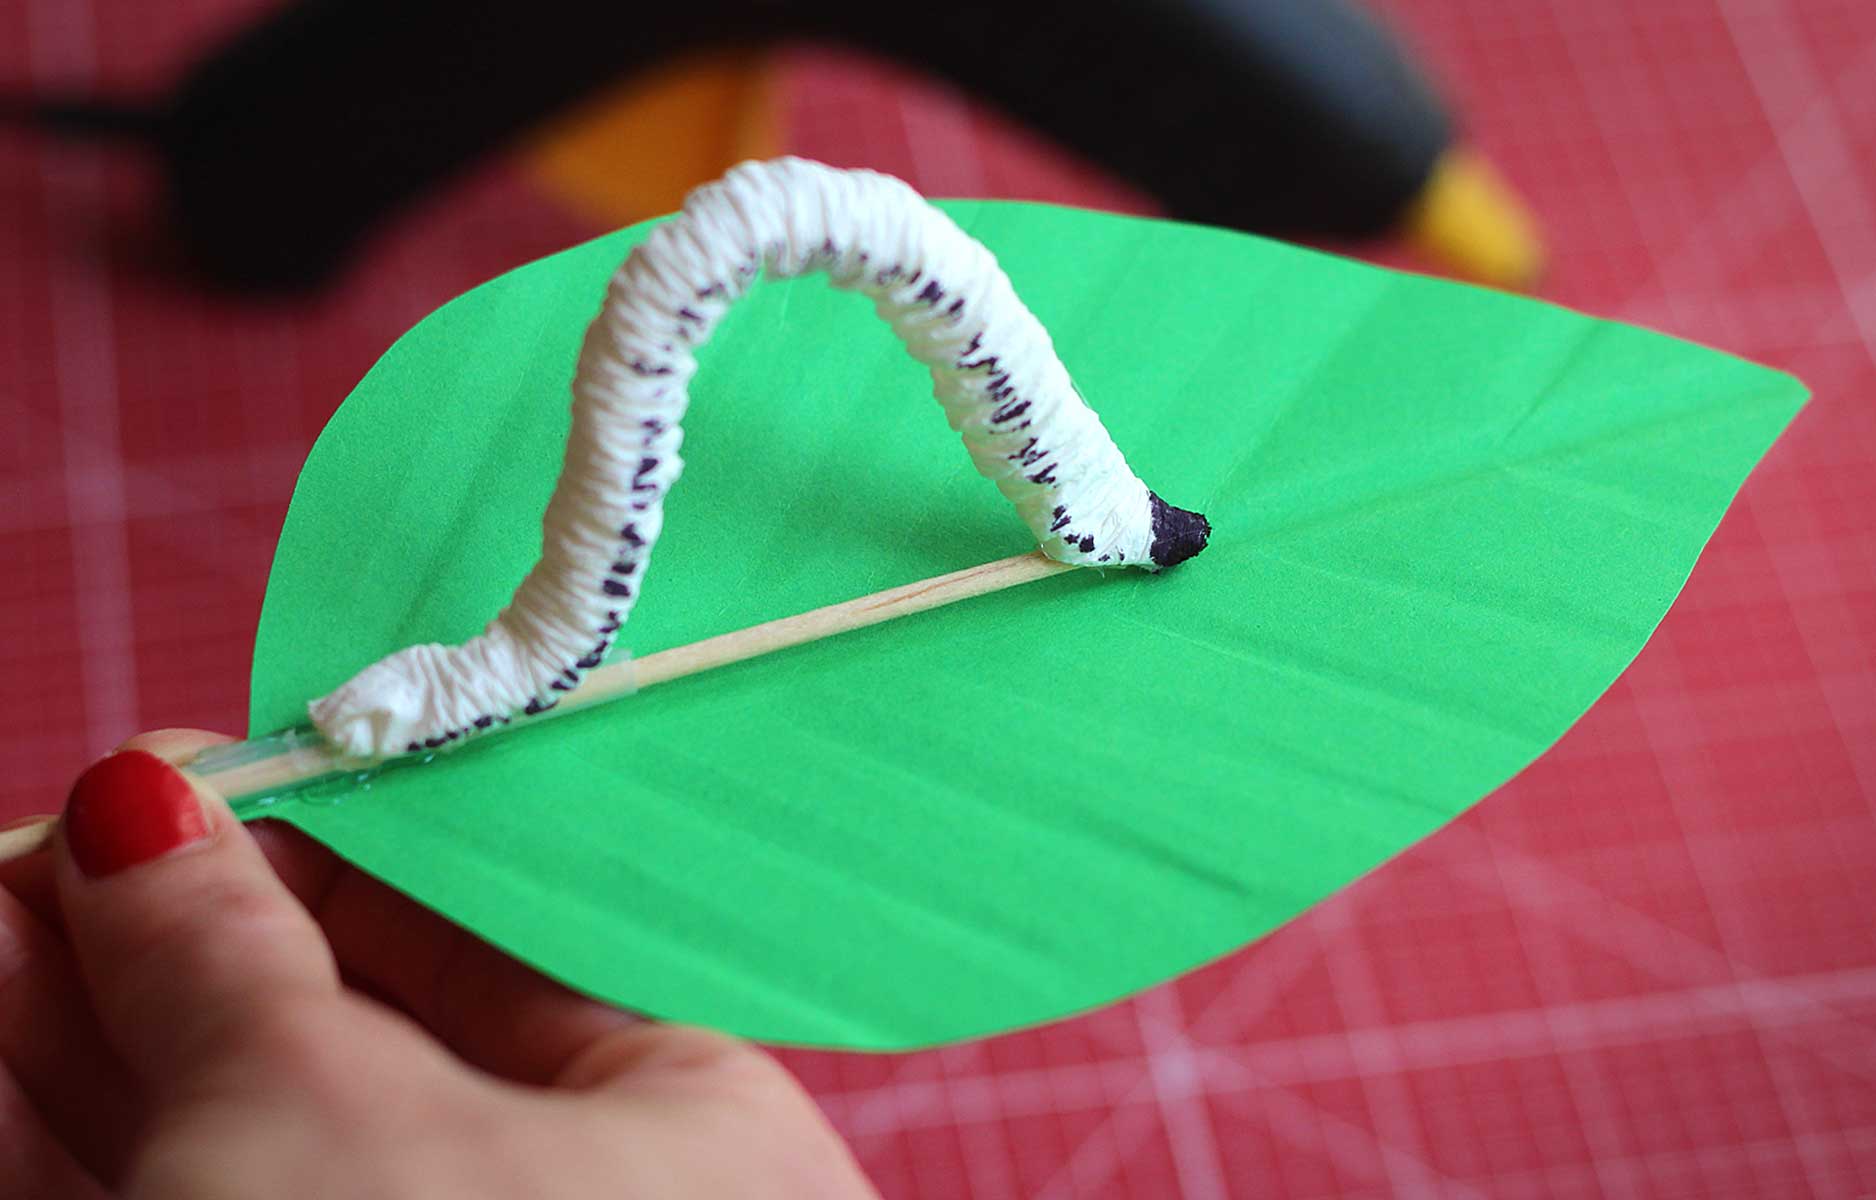
Willst du noch mehr tüfteln? In dieser Anleitung zeigen wir dir, wie du eine realistische Raupe basteln kannst.
Hinterlasse uns doch bitte einen Kommentar. 🙂
Ähnliche Artikel:
3 Kommentare
Das wird bestimmt auch meinen Kindern gefallen, das ist wirklich eine tolle Idee das ich mit meinen Kindern am Wochenende umsetzen werde.
Hallo! Der Vulkan war beim Kindergeburtstag der Hit! 👍 Vielen Dank für die Anleitung!
Liebe Grüße Anja
Schreibe einen Kommentar Antworten abbrechen
Deine E-Mail-Adresse wird nicht veröffentlicht. Erforderliche Felder sind mit * markiert

Easy Volcano Eruption Experiment for Kids (3 Methods & Beautiful Results)
- August 19, 2019
- 3-4 Year Olds , 5-6 Year Olds , Chemistry , Fizzy Science , Outdoors , Taste-safe
Are you looking for an easy fun and intellectual science experiment for your kid’s science fair!? If yes, then you are on the right page where you will get three easy simple and super fun experiments that works better as a science project. What’s that!? It’s a ‘Volcano making’ at home with your kids.
After watching a documentary on television regarding volcanoes, aroused an interest to create fake volcanoes. Immediately I shared my idea with my girls of 5 and 7 years old. They were very excited by listening the name itself. That is how I started experimenting this super fun activity at home.
Method-1: Making Volcano using Baking Soda and Vinegar
You will need few simple things that you can find in your home or stores easily. The supplies required to mimic the lava that of a real volcano are listed below:
- Baking soda
- Food colouring (your preferred color)
- Dish wash soap
- Volcano mold (you can create one using play dough)
- Kids toys (optional)
[*Product links are affiliate links. Your support is highly appreciated]
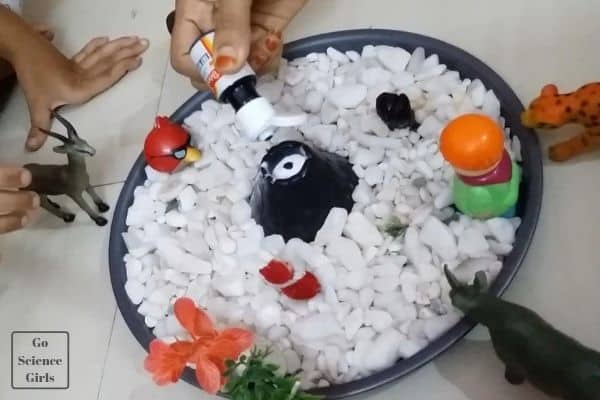
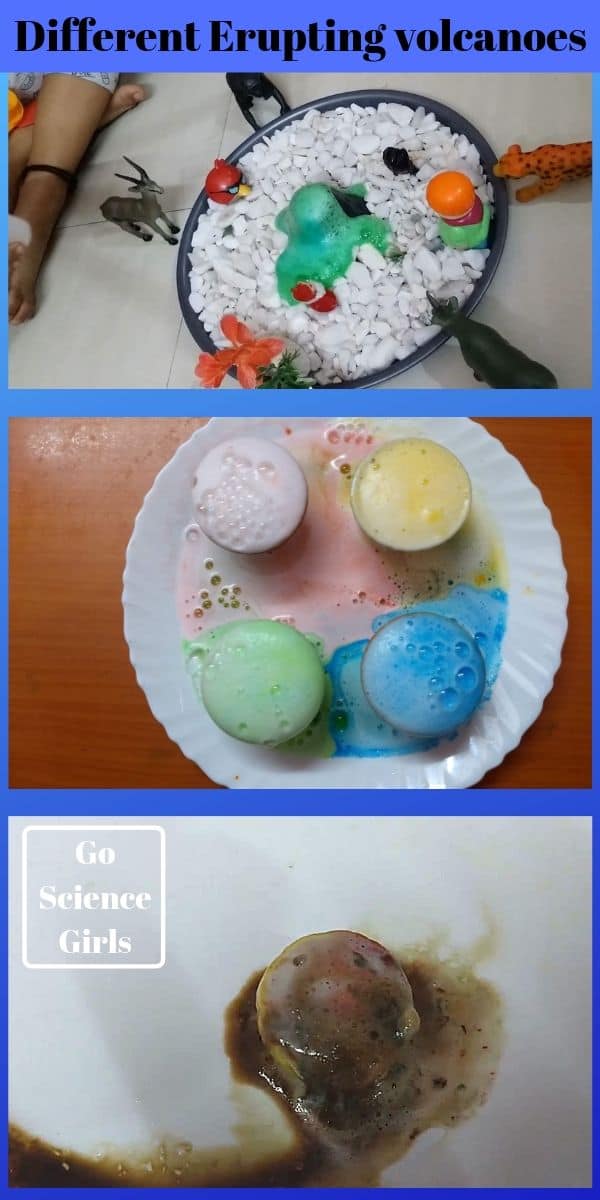
1) Take a ready-made Volcano or you can make it at home using plastic bottles. Fill the volcano with white marble stones to give it a colorful look as well as kids can get better view on the white background.
2) You can also decorate around the volcano with some kid’s toys to make it more attractive and catchy. Adding kid’s toys to the volcano also grabs kid’s attention as toys are never boring for any kids or even adults. J
3) Find some private space since the volcano eruption makes a mess. As we are using ready-made volcano plate, hopefully the mess is only inside the plate.
4) Do some preparations or trials before you start the actual experiment in order to learn proper amounts of ingredients that decide how big your volcano should be!
5) Now my elder daughter Prithika added required amount of baking soda (one of the magical ingredients) into the volcano. She is always interested in adding ingredients. In one way, it helps her to learn more about mixing and measurement concepts.
Now let us jump into the second method of making homemade volcano which is as simple as first method.
Method 2 Volcano in the bowls using same ingredients
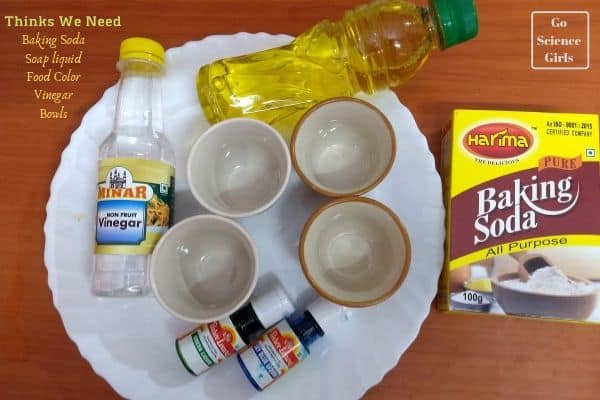
- Soap liquid
- Food colour
- Bowls (make sure the bowls are neatly washed as the volcano is not formed if there are any other chemical substances which may get react and form other reactions)
1) Take four bowls and arrange them neatly on the work table or work place. It is suggested to take the bowls in a wide and big plate so that the eruption will flow or spread wide area and be within the plate.
2) Add different food colours to four different bowls so that it gives different coloured volcanoes. My daughters are excited to add their favorite colours. In fact this is their most favorite step in every activity we does (if there are chances to add any colours while experimenting).
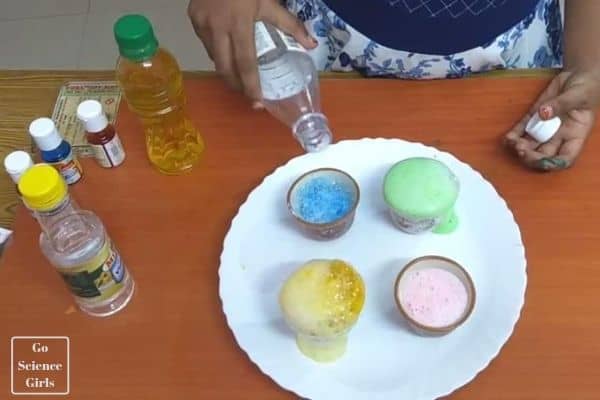
This is the simple and easiest way to attract or fascinate the people at the science fair.

Method 3 Creating Volcano experiment with Lemon
Make lemon volcanoes (ideal experiment) along with your kids using kitchen ingredients. The end result is wonderful that leaves a surprise on kid’s face. This is another easiest method to create colorful volcano using lemons. Let us see how we can amaze children using lemon.
Materials required
All you need are:
- Tray or a white plate
- Cutting knife or Butter knife
- Spoon or Fork
- Food coloring
Instructions
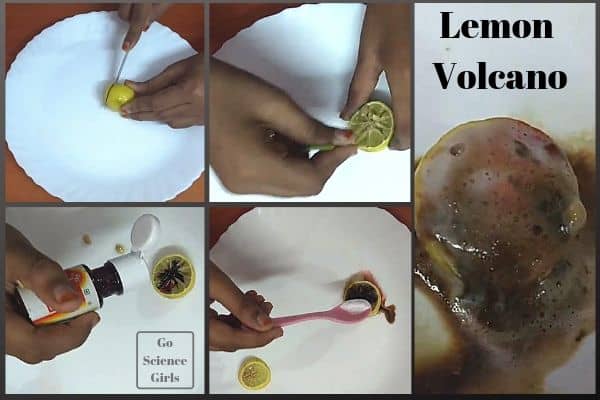
1) Take a medium sized lemon and cut into 3/4 th using butter or cutting knife.
2) Squeeze out the seeds and some lemon juice (leaving some juice) with the help of spoon or fork.
3) Add few drops of food colour to the inside of the lemon. Choose some bright colours to see bright and colourful lemon volcanoes. We used red orange and yellow food colours to get orange-red lava! Kids enjoyed watching bright display of volcanoes.
4) Put some baking soda on top of the lemon to see the amazing results.
5) Use spoon or fork to let the baking soda inside the lemon.
As soon as you add the baking soda to the lemon, there happens a chemical reaction again between the lemons (acidic in nature) and the baking soda (base). This chemical reaction leaves a gas known as carbon dioxide which is responsible for the frothing and fizzing of the eruption coming out of the lemon.
A volcano is a typically conical mountain or hill that has lava coming out from a magma chamber under the surface of the ground. The materials include in the volcano are lava, gaseous sulfur compounds, steam, heat, broken rock pieces and ash. The volcano erupts and explodes all these materials out when there are right conditions like high temperature and pressure.
However, in our home experiment of creating fake volcano gives an idea of how a volcano looks like when the lava erupts. This is a simple classic science experiment works based on a chemical reaction and showing physical volcano eruption. The chemical reaction is nothing but a reaction between the baking soda and vinegar results in the release of a gas called carbon dioxide. Carbon dioxide is the same gas which is used in sodas for the purpose of carbonation. You can observe the same reaction what you see when the soda bottle is shaken up and remove the bottle cap. The pressure created while shaking make the gas molecules to spread out as there is no enough space to spread, it comes out of the bottle when the cap is opened. In the same way, the carbon dioxide released (because of the chemical reaction between baking soda and vinegar) builds up enough pressure inside the volcano finally results in the eruption in order to exit the bubbles.
In other words, the chemical reaction between baking soda and vinegar is said to be an ‘Acid-Base Reaction’. Because the chemical reaction is happening between the acetic acid (vinegar) and a base (sodium bicarbonate). The acetic acid (a weak acid) reacts with and neutralizes the base ( sodium bicarbonate ). The gas released during the reaction is the carbon dioxide. Carbon dioxide is the main culprit for the fizzing and bubbling of the wonderful ‘eruption’.
This project takes not more than 30 minutes to complete. I could say that it is a classic science experiment because kids will get to learn chemical reactions and observe what is happening when a volcano erupts. Sounds cool right!!? Did you know the carbon dioxide gas released during the experiment is also present or produced during real volcanoes!! Hope you all enjoyed to learn about colorful fake volcanoes in three different methods. Happy experiment!!
Some Q&A for your interaction with kids
In our experiment, baking soda and vinegar are the magic ingredients to create a volcano at home. When the baking is combined with the vinegar, there happens a chemical reaction producing a gas called carbon dioxide which causes a volcano to erupt (looks similar to the real volcano eruption). The carbon dioxide gas creates pressure to throw out the gas bubbles inside the volcano thus exit the volcano like real ones.
We always have to be very careful while adding ingredients in right amounts in order to get our wonderful results. We may not get our desired results if we miss to add right amounts of ingredients. In our experiment, we require 2 table spoons of baking soda to mix in 1/4th cup of vinegar to erupt a beautiful volcano at home.
Take your chemical volcano project to the next level and make it more exciting by creating glowing volcano. For a glowing lava, use tonic water instead of vinegar and a black light. You can also use both the ingredients i.e. take equal quantities of vinegar and tonic water to make erupting glowing volcano under a black light. Tonic water consists of fluorescent compound called quinine, which is responsible for glowing volcano eruption. The other way to create glowing volcano is to wrap the volcano around the tonic water bottle and just drop the Mentos candies into the bottle. You can see the amazing glowing volcano at home. One more method to see colorful glowing volcano is to mix the chlorophyll with vinegar. The chlorophyll when expose to ultra violet light, starts glowing in red. Hence, you can see the red glowing volcano.
You see a lot of bubbling and foaming while erupting volcano. Formation of bubbles and foam is due to the combination of baking soda and vinegar. When the baking soda (a base, sodium bicarbonate) is mixed with the vinegar solution (an acid), there happens a chemical reaction releasing a gas known as carbon dioxide. The carbon dioxide is unstable and fills the volcano with a lot of bubbles. Due to the pressure builds up in the volcano due to carbon dioxide gas, the gas bubbles gets exit the volcano like a real volcano eruption.
Both the ingredients are responsible for the chemical reaction because baking soda is a base (called sodium bicarbonate) reacts with the vinegar, an acid producing carbon dioxide.
According to the studies, using baking soda is completely safe since it is mild and unscented for kids. Baking soda has both the alkaline and antiseptic properties that soothes the acidic nature of skin and protects it from infections. It tastes bitter so kids obviously would not like to put in their mouth. However, it is always good to take extra care while using baking soda very often.
Leave a Reply Cancel Reply
Your email address will not be published. Required fields are marked *
Name *
Email *
Add Comment *
Save my name, email, and website in this browser for the next time I comment.
Post Comment

Easy DIY Volcano for Kids Science and Art
My kids have always loved creating and doing anything hands-on. Art and science experiments have definitely filled many of our days. One of my kids favourite experiments is experimenting with baking soda and vinegar. They love the ‘explosion’ that it creates. I decided that it would be fun to create a DIY volcano to put the ‘explosion’ in.
This DIY volcano is pretty simple to make and the other great thing about it is that you can use it more than once. The steps are all clearly listed below and explains how to make a volcano for kids, or by kids.
This worked out really well for me because I teach kindergarten and the children at school had shown an interest in volcanos. Therefore, I was able to use my DIY volcano again, many times, at school.
For this DIY volcano I needed it to be simple enough for kids to make, but I also wanted something that was strong enough that I could use several times – not just once. This DIY volcano has been been used dozens of times and is still holding strong.
When I was a student in school, I still remember using plaster cloth for an art project. I remember loving the way it felt and the way you could mold it over shapes. I also remember the art that I made was strong and I held onto it for many, many years.
It is such a unique material to work with!
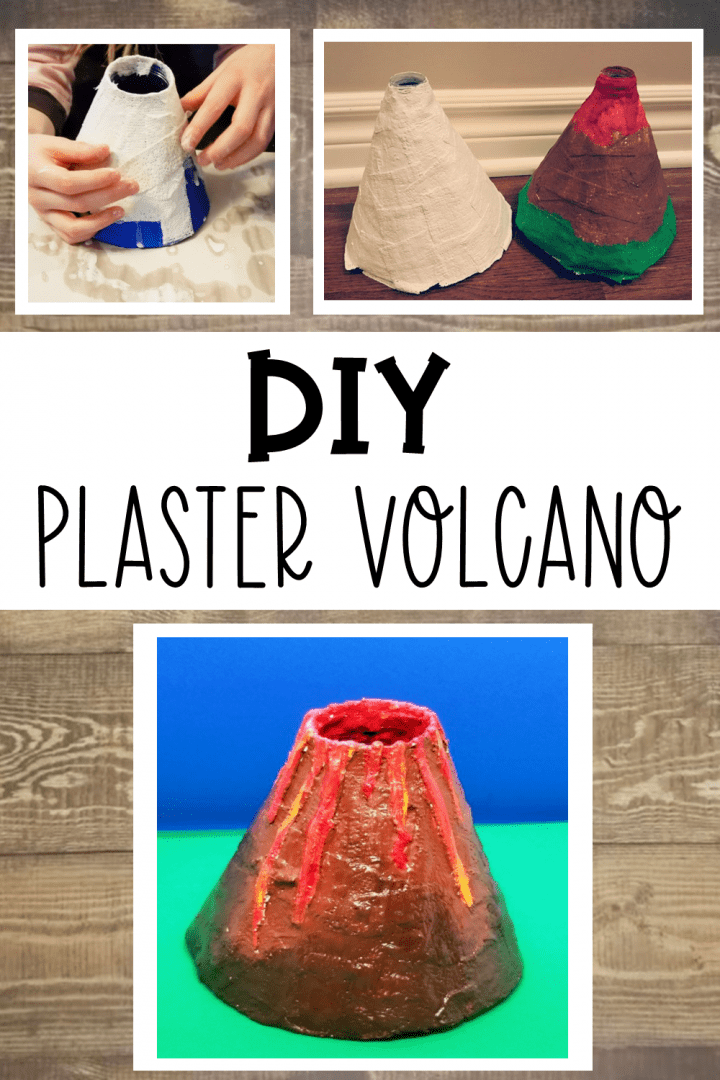
If you have never used plaster cloth before, this DIY volcano is a great place to start. Kids will love the feel of it and it makes for a unique arts and crafts project.
DIY Volcano Materials
For the DIY Volcano Project for Kids
- Plaster Cloth
- Construction Paper
- Empty Plastic Bottle or Small Cup
For the science Experiment
- Baking Soda
- Red Food Colouring (Optional)
We made two volcanos. In one we used a small water bottle. In the other we used a small cup. The size of the bottle doesn’t really matter, except the bigger you use the more baking soda and vinegar you will need to get the volcano to ‘explode’.
You can usually find plaster cloth at a craft store. It is similar to the material used for casts for broken bones. It also hardens to about the same strength. A link to purchase plaster cloth is provided below.
How to Make a DIY Volcano for Kids
Volcano project for kids – the steps:.
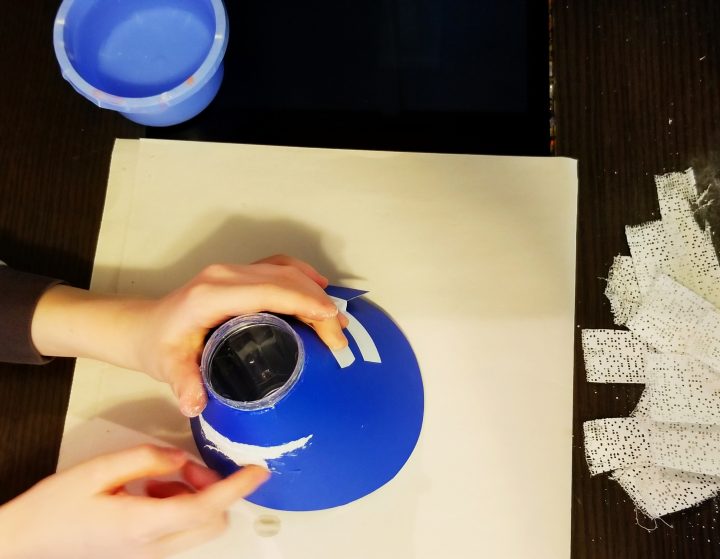
The first step to creating your volcano is cutting a piece of construction paper to wrap around the sides. I never found a really simple trick to doing this, but you can just roughly tape and cut so that it fits. The construction paper doesn’t have to look great because you are going to cover it up anyways.
When you wrap the construction paper round, and cut a hold for the top. It is best to have the paper start below the top opening of the bottle or jar you are using.
You don’t want the vinegar and baking soda that you will use for the lava to be able to soak into the construction paper.

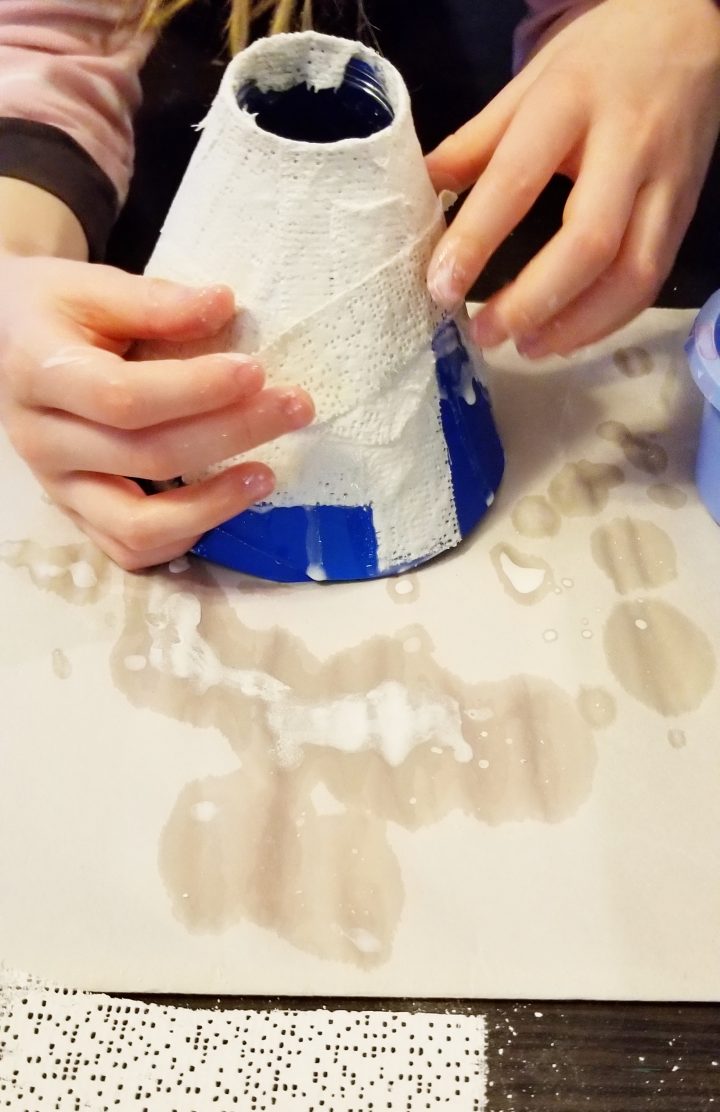
The next step is cutting up the plaster cloth into small pieces and strip. My kids loved using the plaster and applying it to the construction paper. They fully dipped it into water and then pressed it to the sides. Then use a finger to smooth out the plaster.
The more layers you add, the stronger your volcano will be. I added two layers and our DIY volcano has held up very well.
When you add the layers of plaster cloth, make sure to have some fold over the top to seal around where the ‘lava’ will come out of.
It is also a good idea to tuck a layer underneath the bottom. This way after your volcano has exploded and the lava has run down the sides, and your volcano is sitting in the lava, it won’t soak into the construction paper and cause your volcano to break down faster.
Decorating Your DIY Volcano
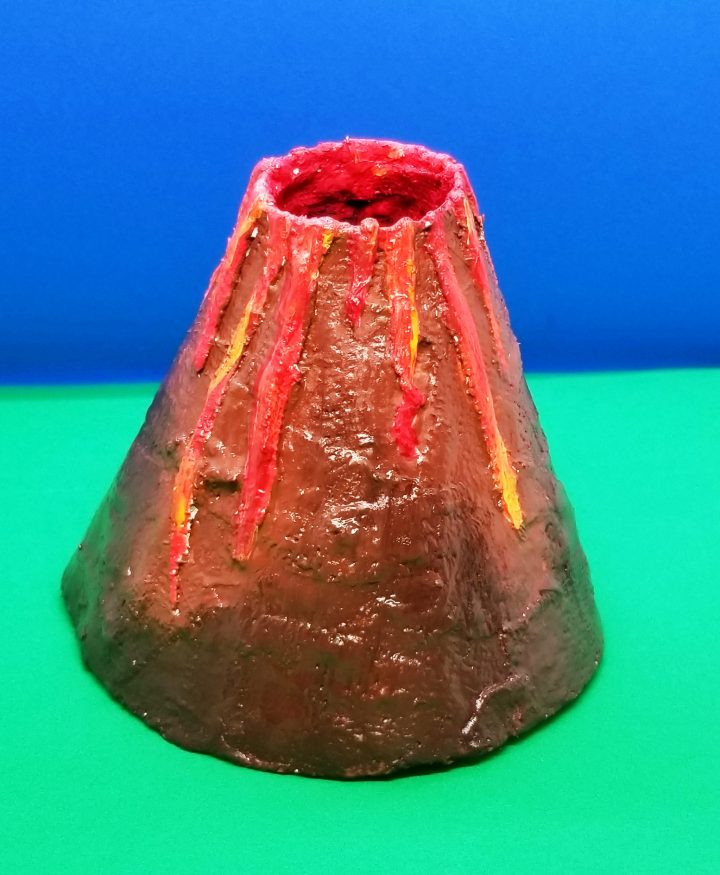
Once you have finished you DIY volcano with kids, you can add some extra details. My kids decided to use some of the plaster cloth to drape over the top opening. They twisted and laid the cloth down the side to look like lava.
We all loved the look of this when it was dry because it gave it an extra 3 dimensional effect. It also made painting the volcano easier and better.
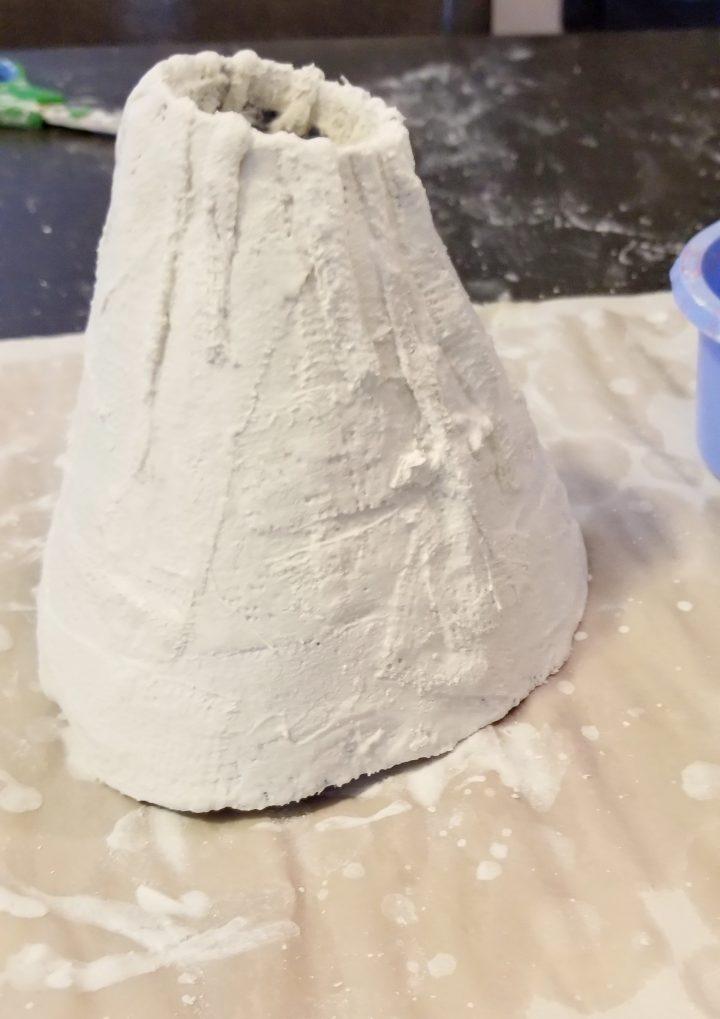
Once you have finished and covered your volcano, leave it to dry. Overnight is ideal, but the plaster cloth does dry quite quickly.
Once it is fully dry, the fun begins with painting. How you choose to paint your volcano is up to you. Kids will love putting their own twist on their volcano if they are given the chance.
Over the years I have seen some really amazing purple and sparkly DIY volcanos by kids. Adding some extra details with paint can make a big difference in the overall look of your volcano.
We used red, orange and streaks of yellow for the lava. We stuck to painting the extra pieces of cloth that we added to drape down the sides.
Then we added brown for the rest of the volcano and finished off with some dark brown along the bottom and my other daughter added some green for grass.
You can put a finish on your volcano, that can give it some shine and some extra protection. You DIY volcano is now complete! But the fun has just begun!
DIY Volcano Science Experiment
As with all science experiments, make sure children are supervised.
Making your volcano explode is really simple. All you need is baking soda, white vinegar and red colouring. I filled the water bottle in my volcano 3/4 of the way full of baking soda (a funnel can work really well).
The more you add, the bigger your explosion, but you want to leave enough room for the baking soda and vinegar to be able to mix.
Place a tray or bowl under your volcano to catch the lava that flows out. It can get messy!
Next, add red food colouring to white vinegar. You don’t need the food colouring for the lava to work, but it makes for some great looking lava.
Start with 1/4 of vinegar and pour the vinegar onto the baking soda. Immediately, your volcano will explode. You can continue adding vinegar and baking soda until the volcano doesn’t explode any more. Watch the lava flow over the sides!
Young kids love when things ‘explode’ and this is such a great example of a chemical reaction. Kids have fun making these and they are easy enough to do with little hands.
The great thing about this DIY volcano is that as long at it does not get soaking wet, you can simply wipe it down and store it to use again next time!
This DIY volcano for kids worked out really well for me because we experimented with it at home several times and I was able to use it several more times in my classroom. It looks great, stays strong and is a great way to mix art and science together!
Extension Ideas
If you really want to impress kids with an ‘explosion’, try using this foam/lava recipe. A few more materials/ingredients are needed, but the lasting, foaming explosion is definitely worth it!

DIY Volcano Art Activity
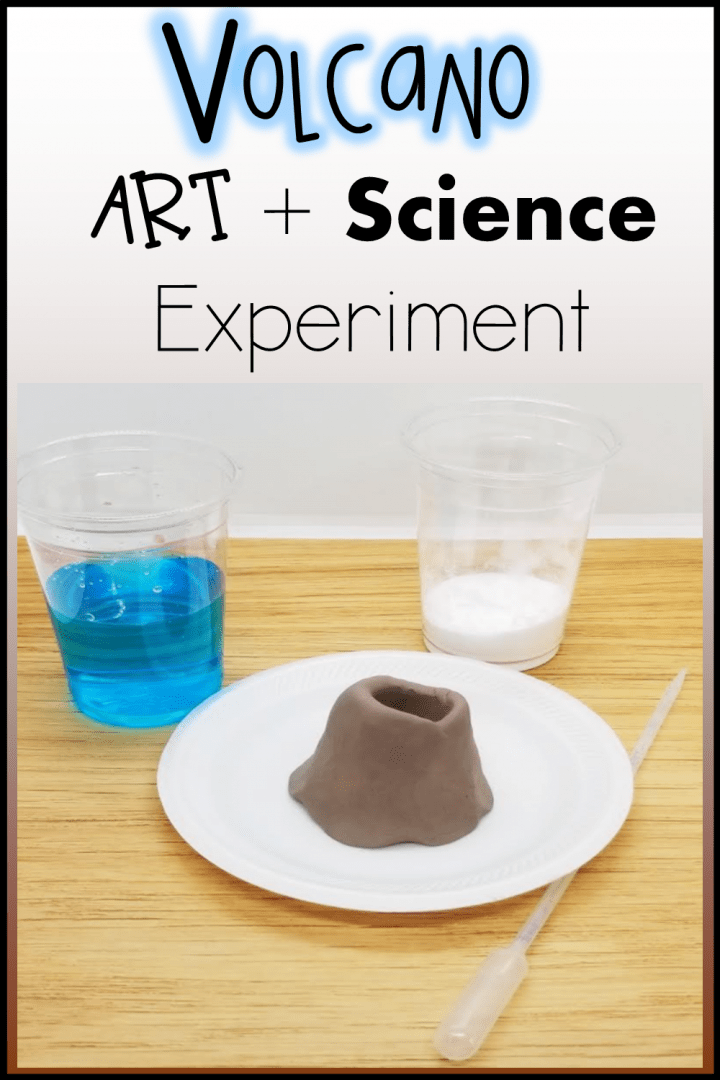
If you love the idea of creating a volcano and then doing an explosive science experiment, there are many different ways to create your volcano. I often use clay so that even young children can create their own volcano.
How to Make a Volcano for Kids Extension Ideas
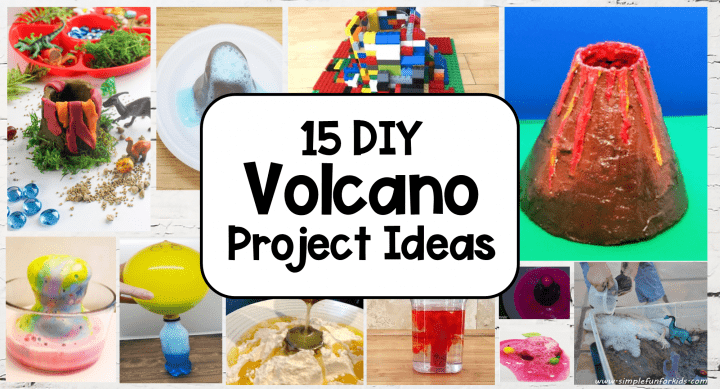
If you want to keep the interest in volcanoes and learning going, check out this collection of 15 How to make a volcano project ideas.
Subscribe for FREE Printables
Join Hands-On Teaching Ideas for hundreds of activity ideas. When you subscribe you will also gain access to the Free Resource Library. The library is filled with over 100 printables resources.
Click the image below to sign up and gain instant access to the Free Library.

More Hands-On Teaching Ideas
Check out more learning activities for kids at school or at home.
Leave a Reply Cancel Reply
Your email address will not be published.

- [about Frl. Päng]
- [work with Frl. Päng]
- [ask Frl. Päng]
- [DIY with Kids]
- [Impressum]
- [FREEBIES for you]
22 August, 2017
Das vulkan experiment - coole experimente für kinder.


2 Kommentare:

Cool!! Das machen wir morgen!! Das wird den Mädels Spaß machen... Liebe Grüße Hanna

Das hätte letztes Jahr wirklich gut zum Dino-Geburtstag gepasst. Dieses Jahr feiern wir eine Piratenparty..... ob man das irgendwie dafür nutzen kann?!?! z.B. als Vorspiel für das Spiel "Der Boden ist Lava" - ja. Die Idee nehme ich gern mit! DANKE fürs Teilen LG Zottellotte Sonja
Und was denkst du darüber?
Hinweis: Nur ein Mitglied dieses Blogs kann Kommentare posten.
- PRO Courses Guides New Tech Help Pro Expert Videos About wikiHow Pro Upgrade Sign In
- EDIT Edit this Article
- EXPLORE Tech Help Pro About Us Random Article Quizzes Request a New Article Community Dashboard This Or That Game Forums Popular Categories Arts and Entertainment Artwork Books Movies Computers and Electronics Computers Phone Skills Technology Hacks Health Men's Health Mental Health Women's Health Relationships Dating Love Relationship Issues Hobbies and Crafts Crafts Drawing Games Education & Communication Communication Skills Personal Development Studying Personal Care and Style Fashion Hair Care Personal Hygiene Youth Personal Care School Stuff Dating All Categories Arts and Entertainment Finance and Business Home and Garden Relationship Quizzes Cars & Other Vehicles Food and Entertaining Personal Care and Style Sports and Fitness Computers and Electronics Health Pets and Animals Travel Education & Communication Hobbies and Crafts Philosophy and Religion Work World Family Life Holidays and Traditions Relationships Youth
- Browse Articles
- Learn Something New
- Quizzes Hot
- Happiness Hub
- This Or That Game
- Train Your Brain
- Explore More
- Support wikiHow
- About wikiHow
- Log in / Sign up
- Education and Communications
- Science Experiments
- Junior Science Experiments
How to Create a Mini Volcano
Last Updated: August 23, 2024 Fact Checked
This article was reviewed by Anne Schmidt . Anne Schmidt is a Chemistry Instructor in Wisconsin. Anne has been teaching high school chemistry for over 20 years and is passionate about providing accessible and educational chemistry content. She has over 9,000 subscribers to her educational chemistry YouTube channel. She has presented at the American Association of Chemistry Teachers (AATC) and was an Adjunct General Chemistry Instructor at Northeast Wisconsin Technical College. Anne was published in the Journal of Chemical Education as a Co-Author, has an article in ChemEdX, and has presented twice and was published with the AACT. Anne has a BS in Chemistry from the University of Wisconsin, Oshkosh, and an MA in Secondary Education and Teaching from Viterbo University. This article has been fact-checked, ensuring the accuracy of any cited facts and confirming the authority of its sources. This article has been viewed 310,939 times.
Mini volcanoes are a popular science experiment for children to learn about chemical reactions. When baking soda and vinegar combine in the volcano, they make a water and carbon dioxide “eruption” that looks like lava from a volcano! You can easily do this fun experiment at home using a cup, baking soda, salt, and vinegar.
Ingredients
- 2 tablespoons (28.8 g) of baking soda
- 1/2 teaspoon (3 g) of salt
- 1-2 drops of washable paint
- 1-2 drops of dish soap
- 1 cup (240 mL) of vinegar
Mixing the Lava Ingredients
- The baking soda will react with the vinegar to cause the reaction, so make sure there's more baking soda than salt in the cup.
- Washable paint is less likely to stain your hands or the ground than food coloring, but you can use food coloring if you don't have paint available.
- The color and type of dish soap doesn't matter, as long as it produces bubbles when added to water.
- If you don't have a small toothpick or stick, you can use a spoon. However, since the spoon is bigger, some of the baking soda “fuel” can stick to the spoon, causing the reaction to be less intense.
Building the Volcano
- Remember that the outside of the volcano will quickly be covered with the “lava,” so the clay doesn't need to be dry.
- You might also have to trim around the base of the volcano to make sure it isn't crooked. Don't worry about making it perfect, as long as the general shape is right.
- Thinner paper, like regular printer paper, will start to collapse once it gets wet when the lava starts. Try to use a thicker paper, like construction paper, or a coated paper, like wrapping paper.
- For clay figures, you can press plastic dinosaur figures into the clay to create a fun Jurassic scene!
- If you're doing the project outside, consider using rocks or sand to surround the base of your volcano, making it even more realistic!
Making an Eruption
- If you're doing this experiment with kids, you can talk to them about what's going to happen as you start pouring the vinegar into the cup.
- If it doesn't start within 10 seconds, add an extra tablespoon (14.4 g) of baking soda to the reaction.
- If the lava starts to lose its color, add another drop of paint before adding more vinegar!
Community Q&A
Reader Videos
- Don't be afraid to touch the lava as it comes out of the volcano! Since its just water and bubbles, it's safe to play in the lava while you watch it erupt. Thanks Helpful 2 Not Helpful 0
Tips from our Readers
- To reuse your volcano, simply add more baking soda and vinegar. For each 2 tablespoons (28.8 g) of baking soda, you can safely add 2-3 cups (473-710 mL) of vinegar before needing to rebuild.
- Doing this experiment indoors? Be sure to place your volcano over a spill-proof tray or inside a large plastic bin to catch any overflow. Wipe up spills immediately to avoid stains.
- Get creative with building materials! Use playdough, salt dough, or papier mâché instead of clay for the outer structure. Or recycle items like oatmeal containers for the base.
- For a more dramatic eruption, add several drops of red or orange food coloring to the baking soda mixture. The more vibrant the lava color, the more exciting for kids.
- Capture the volcanic eruption on video by setting up a smartphone or tablet on a tripod. Kids will love rewatching the experiment and seeing their reactions.
- Involve kids in preparing the experiment by allowing them to measure ingredients or mix the “lava." More participation builds science curiosity.

Things You'll Need
- Plastic cup or jar
- Aluminum foil and modeling clay
- Rolling pin
- Construction paper and tape
- Washable paint (optional for adding color to lava and decorating)
- Markers (optional for decorating)
- Plastic tray
- Toothpick or stick for stirring
You Might Also Like

- ↑ https://www.youtube.com/watch?v=qalAKtLbjX8
- ↑ https://www.youtube.com/watch?v=nFZhbEi19M8
- ↑ https://youtu.be/mWZW4FeHHbU?t=216
- ↑ https://www.youtube.com/watch?v=8AqoOOJ3H_I
- ↑ https://www.youtube.com/watch?v=wFSYLQkMR7U
- ↑ https://www.youtube.com/watch?v=U8VEnGcfXHY
About This Article

- Send fan mail to authors
Reader Success Stories
Joel Mendez
Mar 20, 2016
Did this article help you?

Prashant Sutar
Feb 25, 2017

Featured Articles

Trending Articles

Watch Articles

- Terms of Use
- Privacy Policy
- Do Not Sell or Share My Info
- Not Selling Info
wikiHow Tech Help Pro:
Level up your tech skills and stay ahead of the curve
- Grades 6-12
- School Leaders
FREE Thanksgiving Worksheet Bundle for Last-Minute Activities 🦃
16 Red-Hot Volcano Science Experiments and Kits For Classrooms or Science Fairs
Kids will erupt with excitement!
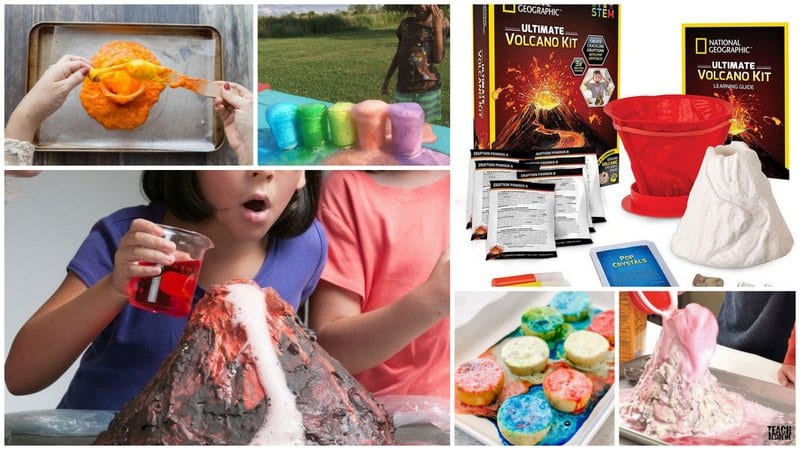
Is there any school science project more classic than the exploding volcano? Every generation of kids loves this explosive (and messy!) experiment, which is usually a take on acid-base reactions. Here are our favorite volcano science experiments and projects, along with some well-reviewed DIY kits that make the process easier.
(Just a heads up—WeAreTeachers may collect a small share of sales from links on this page. We only recommend items our team loves!)
1. Classic Baking Soda Volcano Experiment
This classic experiment teaches kids about simple chemical reactions and physical properties. The best part? It’s easy to do and uses only a few basic ingredients. Check out the link below for a step-by-step guide and free printable student recording sheet.
Learn more: Baking Soda Volcano Experiment
2. Papier-mâché Volcano Experiment
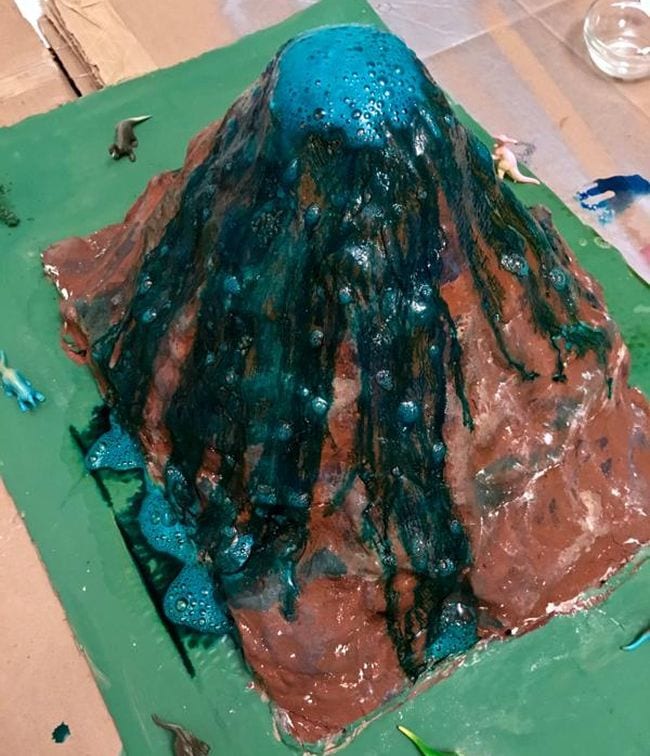
Here it is, the original papier-mâché volcano! The volcano is built around a jar inside that holds the vinegar and baking soda for the eruption itself. Add a little dish soap to make the “lava” foamier and more impressive.
Learn more: Craft Cue
3. Salt Dough Volcano Experiment
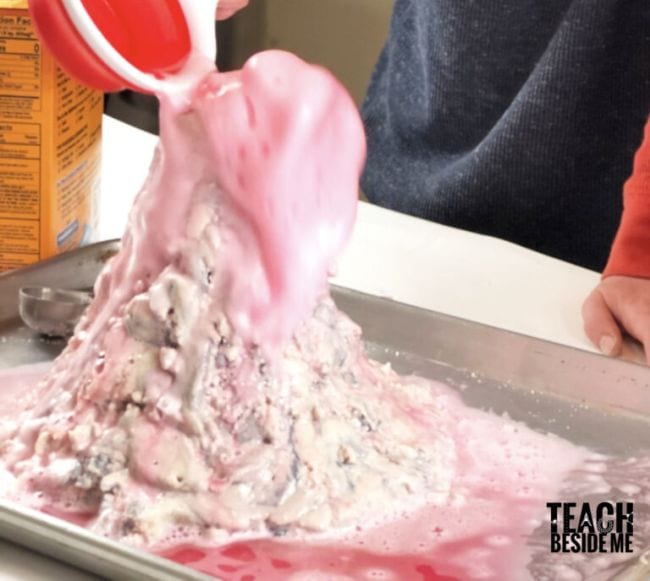
Salt dough is a little easier to work with than papier-mâché, and you can make your volcano pretty realistic looking. Otherwise, the process is the same, and so is the fun!
Learn more: Teach Beside Me
4. National Geographic Ultimate Volcano Kit
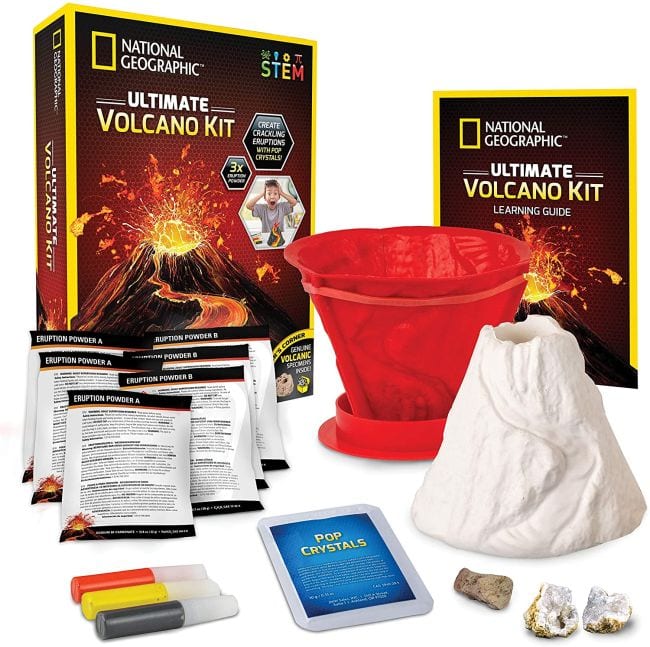
Make things easier by getting all the supplies you need in a volcano science experiments kit. This one has thousands of positive reviews on Amazon and comes with a volcano mold you can use again and again.
Learn more: National Geographic Ultimate Volcano Kit/Amazon
5. Playdough Volcano Experiment
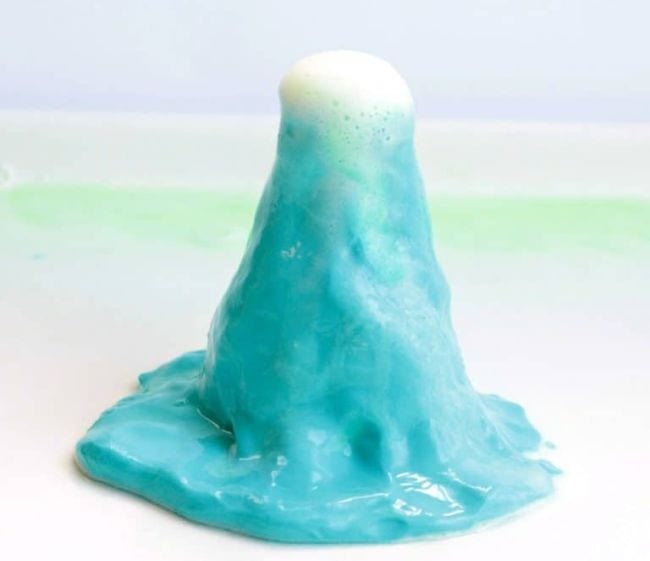
Want a quick version of the volcano experiment? Use playdough to build a volcano around a small beaker, then create the baking soda and vinegar reaction. Fast and fun!
Learn more: Life Over Cs
6. Snow Volcano Experiment
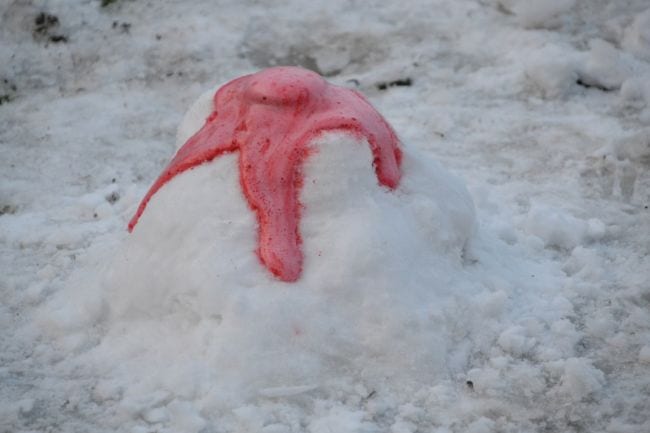
Volcano science experiments can be messy, there’s no doubt about it. That’s why this snow volcano is so brilliant! Take the mess outside and let nature help with cleanup.
Learn more: Science Sparks
7. Playz Volcanic Eruption & Lava Lab Science Kit
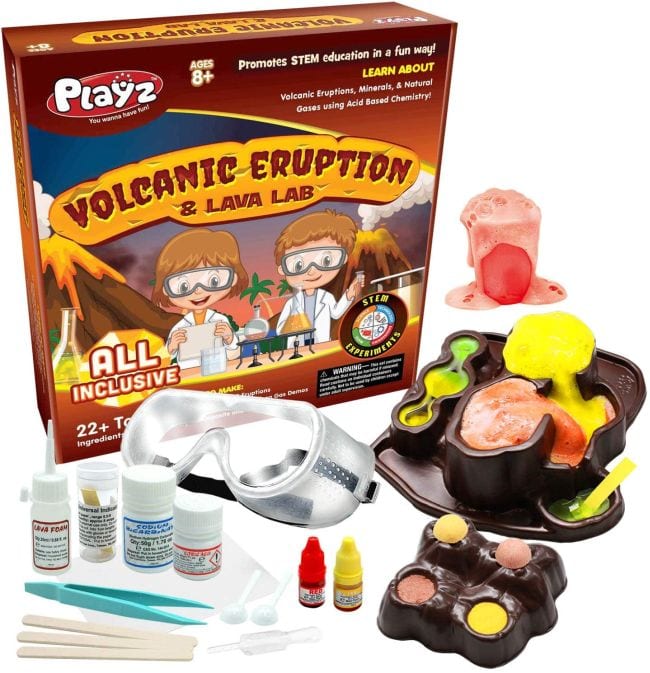
This volcano science kit comes with not one but two erupting volcanoes! There are enough supplies for multiple eruptions too.
Learn more: Playz Volcanic Eruption & Lava Lab Science Kit/Amazon
8. Lemon Volcano Science Experiment
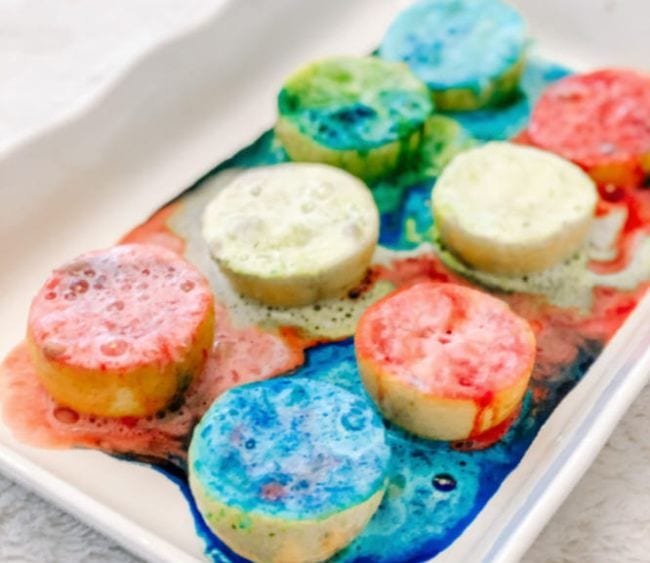
Lemon juice is full of acid, so this fruit is the perfect material for volcano science experiments. Just add a little dish soap (and food coloring for fun). Then top with baking soda and watch the fizzy eruption! Enjoy this one? Try it with apples too!
Learn more: Lemon Volcano/Beyond the Playroom
9. Learning Resources Beaker Creatures Bubbling Volcano Kit
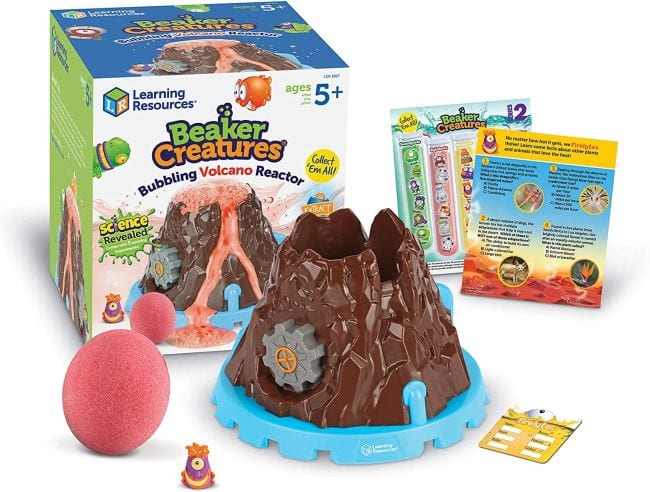
This kit is perfect for the younger crowd. It includes several different fizzing experiments, including a “reactor pod” that you drop into your volcano to reveal a collectible little Beaker Creature.
Learn more: Learning Resources Beaker Creatures Bubbling Volcano Kit/Amazon
10. Pop Rocks Volcano
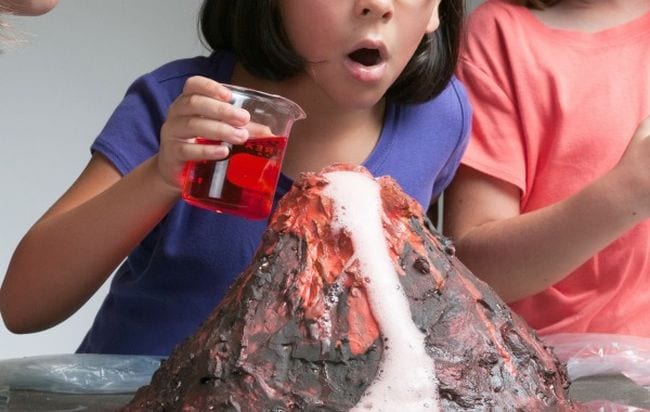
Watch a volcano video and you’ll hear all sorts of popping and cracking sounds. You can recreate that effect in your DIY experiment by adding Pop Rocks candy to make a sound volcano!
Learn more: Growing a Jeweled Rose
11. Stemclas Volcano Science Kit
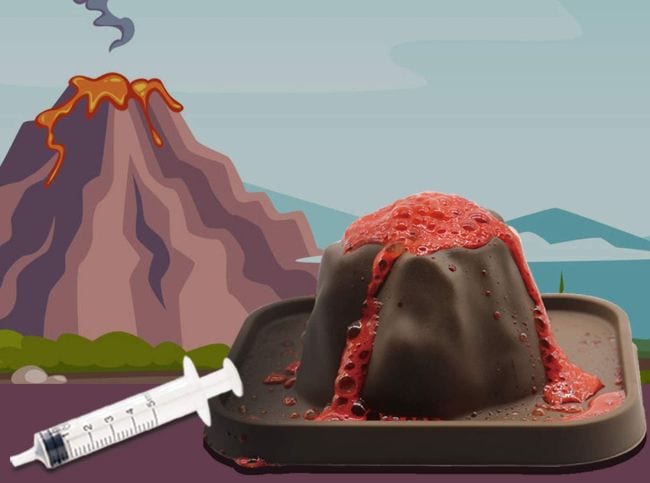
If you’re looking for a truly basic volcano kit, this is the one. No frills, no extras—just a model volcano and the materials you need to make it erupt.
Learn more: Stemclas Volcano Science Kit/Amazon
12. Rainbow Volcano Experiment
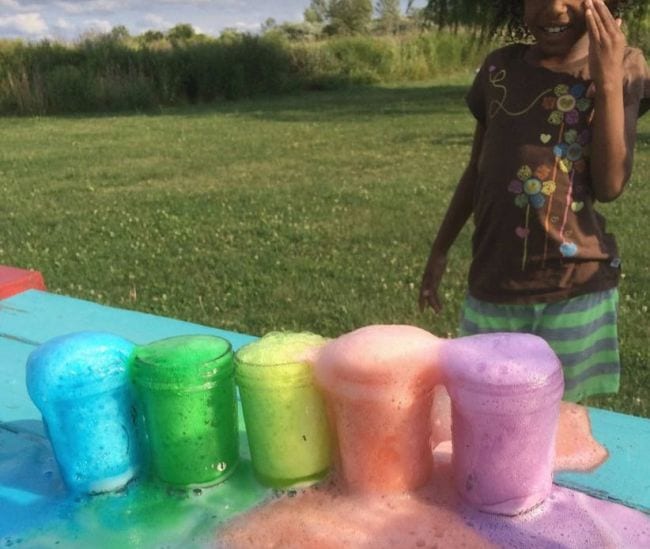
Lava can take on different colors depending on the temperature and chemical composition. So make a rainbow of fizzing “lava” of your own using food coloring!
Learn more: Green Kids Crafts
13. Underwater Volcano Experiment
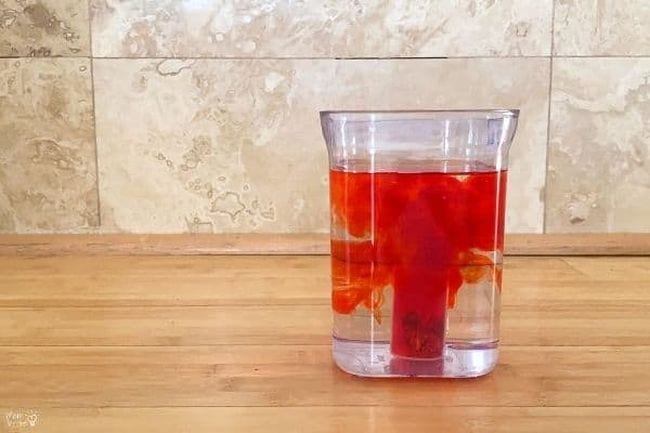
Not all volcanos erupt on land—some are found underwater. This experiment uses the different densities of hot and cold water to make the volcano “erupt.”
Learn more: Mombrite
14. Fizzing Volcano Lava Slime
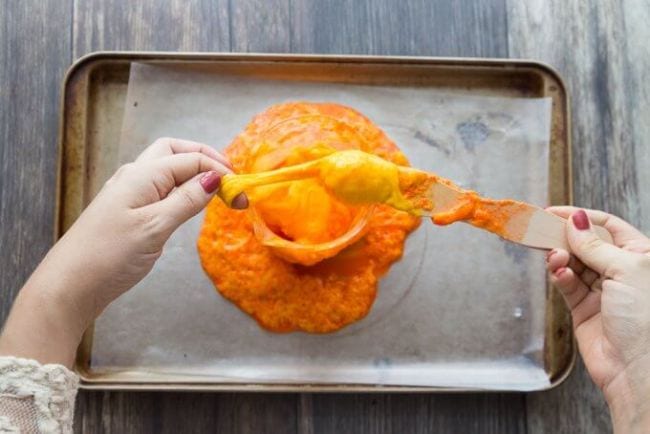
Volcanoes plus slime? It’s every kid’s dream! Mix up some fizzing lava slime that’s much safer to play with than real molten lava! (Make this project even easier by getting all the supplies you need in the Volcano Slime Kit from KiwiCo .)
Learn more: Little Bins for Little Hands
15. Look Inside a Volcano Experiment
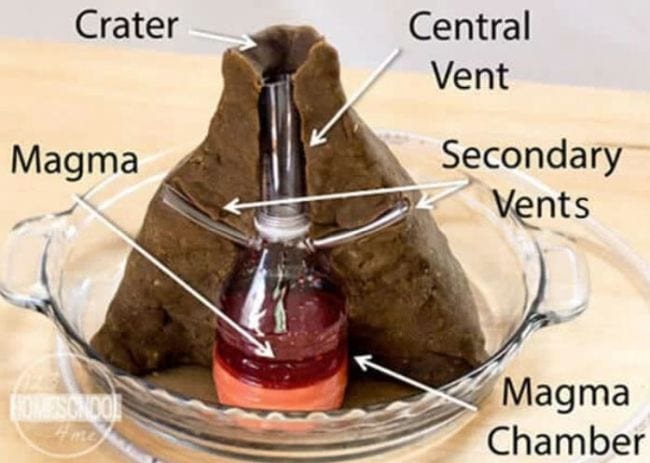
This volcano science experiment digs deeper, laying out items like the magma chamber, crater, and central and secondary vents. The eruption is impressive, and now you can see how happens!
Learn more: 123Homeschool4Me
16. Pumpkin Volcano Experiment
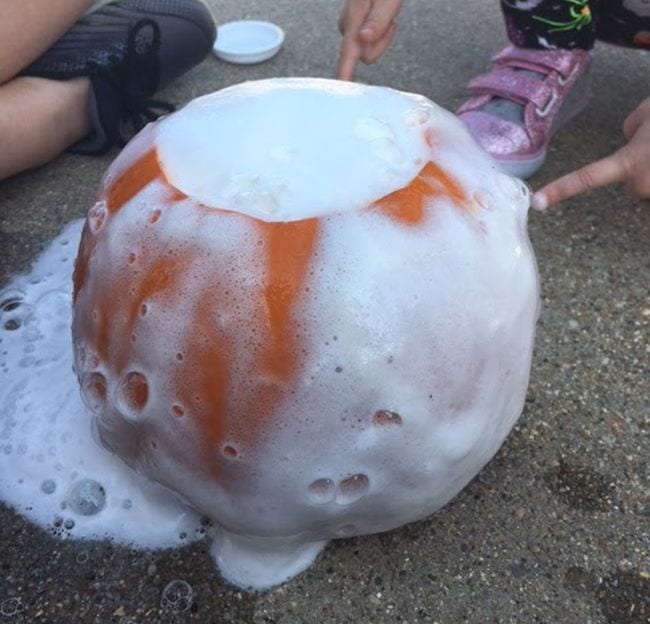
When is a pumpkin not a pumpkin? When it’s a volcano! This is an awesome project to take out onto the playground on a sunny fall day.
Learn more: Hillary’s Teaching Adventures
Want more hands-on science fun? Try these Incredible Electricity Experiments .
Plus, get all the latest teaching tips and tricks straight to your inbox when you sign up for our newsletters , you might also like.
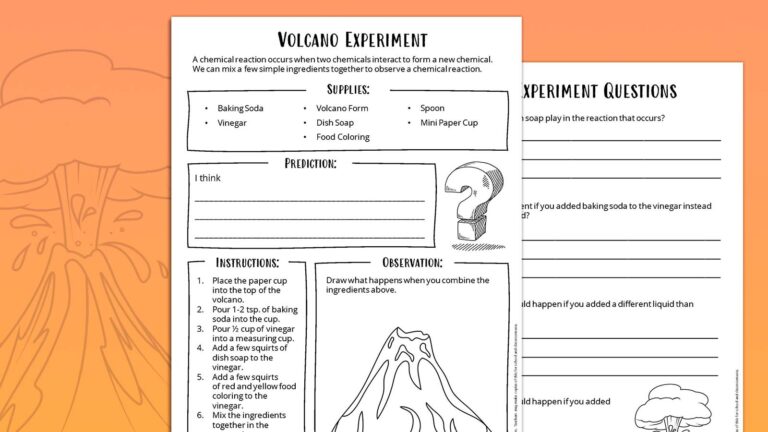
How To Make a Baking Soda Volcano With Free Observation Sheet
This experiment will have kids erupting with applause! Continue Reading
Copyright © 2024. All rights reserved. 5335 Gate Parkway, Jacksonville, FL 32256

IMAGES
VIDEO
COMMENTS
Mit diesem Experiment holt ihr euch einen ausbrechenden Backpulver-Vulkan nach Hause! Wir erklären das Experiment Schritt für Schritt und zeigen ein Video.
Sprudelnder Vulkan mit Zitrone und Brausepulver: Ein Experiment für Kinder mit einfacher Anleitung. Ich zeige Euch, wie der Versuch kinderleicht geht!
Volcano Science Experiment! This is a safe and fun science experiment you can do at home! Learn how to make your own volcano, and find other fun experiments here at SFFE!
Bring science to life with the mini volcano experiment! Learn how to create an erupting volcano using simple household ingredients, perfect for kids. Explore variations like snow and paper mache volcanoes for endless educational fun.
Mit diesem Experiment für Kinder bastelst du leicht einen ausbrechenden Vulkan! Für den Versuch braucht ihr nur Natron und Zitronensäure. Anleitung & Video!
In our experiment, baking soda and vinegar are the magic ingredients to create a volcano at home. When the baking is combined with the vinegar, there happens a chemical reaction producing a gas called carbon dioxide which causes a volcano to erupt (looks similar to the real volcano eruption).
Create your own DIY volcano for kids to do science experiments. Kids will love creating a DIY volcano that mixes art and science.
Ein kleiner Vulkanausbruch im eigenen Garten! Das geht! Das geht sogar ganz leicht! Und mit einer größeren Folie als Unterlage geht das in Ermangelung eines Gartens sogar im Haus! Wir zeigen euch wie es funktioniert. Ihr braucht dafür: 1 Teller. 2 Becher. 1 Löffel. evtl. Klebeband und Schere. schwarze Erde und Steine. 6 EL Essig. 6 EL Wasser.
Mini volcanoes are a popular science experiment for children to learn about chemical reactions. When baking soda and vinegar combine in the volcano, they make a water and carbon dioxide "eruption" that looks like lava from a volcano!
Every generation of kids loves this explosive (and messy!) experiment, which is usually a take on acid-base reactions. Here are our favorite volcano science experiments and projects, along with some well-reviewed DIY kits that make the process easier.